Showing posts with label sprinkles. Show all posts

23 December 2010

Gingerbread Stars

We had a little holiday luncheon at my office last week, so I figured that would be a good time to bring some cookies! I'd been wanting to make gingerbread cookies all month, and here was a perfect opportunity.


I knew I wanted to make stars, because they're pretty, and I can make smaller, bite-sized ones easily. I also didn't have much time, so I wanted something I could decorate quickly. I found the most adorable sprinkles at Target: red jimmies with white candy cane shapes, red nonpareils with green holly leaves, and green jimmies with white snowflakes. I also had a nice big jar of "holiday" nonpareils, basically green, red, and white mixed together. And I had some silver, chunky sprinkles leftover from the time I made geode cupcakes!


Gingerbread Cookies
(adapted from this recipe)

  • 2.5 tbsp dark corn syrup
  • 2.5 tbsp maple syrup
  • 2.5 tbsp packed dark brown sugar
  • 2.5 tbsp white sugar
  • 1 tbsp ground ginger
  • 1.5 tsp ground cinnamon
  • 1/2 tsp ground allspice
  • 1/2 tsp ground cloves
  • 1 tsp baking soda
  • 1 stick (1/2 cup) unsalted butter, cut into tablespoon pieces
  • 1/2 a large egg, lightly beaten
  • 2 cups gluten-free all-purpose flour
  • 1/4 teaspoon salt
  1. Bring corn syrup, maple syrup, sugars, and spices to a boil in a 4- to 5-quart heavy saucepan over moderate heat, stirring occasionally, and remove from heat. Stir in baking soda (mixture will foam up), then stir in butter 3 pieces at a time, letting each addition melt before adding next, until all butter is melted. Add egg and stir until combined, then stir in most of the flour (leave about 2 tbsp aside) and salt.
  2. Preheat oven to 325°F.
  3. Transfer dough to a lightly floured surface and knead, dusting with as much of remaining 2 tbsp flour as needed to prevent sticking, until soft and easy to handle, 30 seconds to 1 minute.
  4. Roll out dough about 1/8-inch thick between 2 sheets of wax paper. Place on a flat surface (cutting board or cookie sheet) and refrigerate for about 10-15 minutes. Cut out as many cookies as possible with cutters and carefully transfer onto parchment-lined baking sheets, arranging them about 1 inch apart.
  5. Bake cookies in upper and lower thirds of oven, switching position of sheets halfway through baking, until edges are slightly darker, 10 to 12 minutes total (watch carefully toward end of baking; cookies can burn easily). Transfer cookies to racks to cool completely. Make more cookies with remaining dough and scraps (reroll once).
  6. Once cooled, decorate as desired.


Royal Icing

  • 3 cups powder sugar, sifted
  • 2 large egg whites
  • 2 tsp lemon juice 
  • 1 tsp almond extract
  1. Mix everything in your Kitchenaid with the paddle attachment on low to low-medium speed until it's smooth and will form soft peaks, about 5 minutes.
  2. Add colors if necessary. Keep covered with a damp paper towel or plastic wrap when not using.
  3. Pipe onto cookies as desired.

 I packaged them up and brought them to my office, then set them out on display for everyone. They loved them and I only had a couple left over to bring home. Yay!

31 October 2010

Sugar Cookies From My Childhood


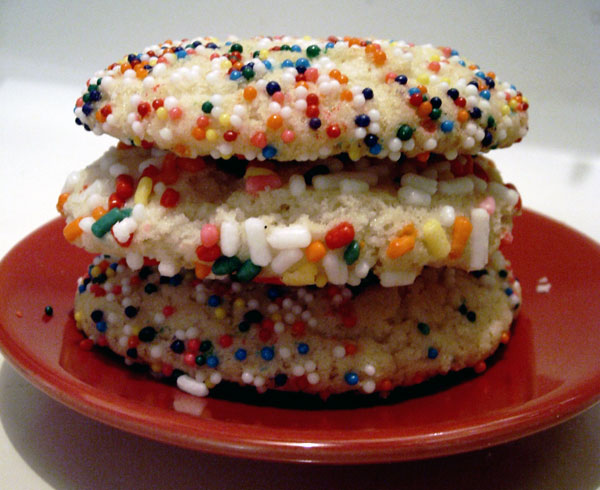
Ever since I was a little girl, I have been in love with sugar cookies. When I would go to the grocery store with my mom, the bakery would give kids a free cookie. I always chose the sugar cookies, preferably with sprinkles. As I grew older, my love for sugar cookies did not fade, but it became harder to find that perfect, nostalgic sugar cookie. The pre-made cookie doughs, or the cooke dough mixes, you can buy at the grocery store never tasted the same. Every from-scratch recipe I tried was never quite right, and way too many of them involved lemon. Am I the only one that thinks lemon flavor has no place in a pristine sugar cookie?!

This week, I got a little craving for sugar cookies, and though these days I normally go for my super favorite - decorated shortbread-like sugar cookies (like Gianna's heavenly creations) - this time I wanted the cookies from my youth. I decided to try a little experiment and see if I could better replicate those nostalgia-inducing sugar cookies. I whipped out my snickerdoodle recipe, but instead of rolling the dough in cinnamon and sugar, I rolled it in sprinkles!


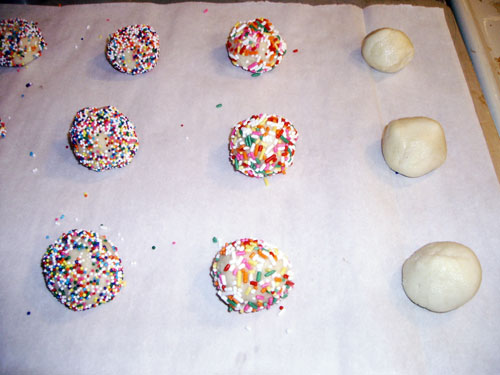
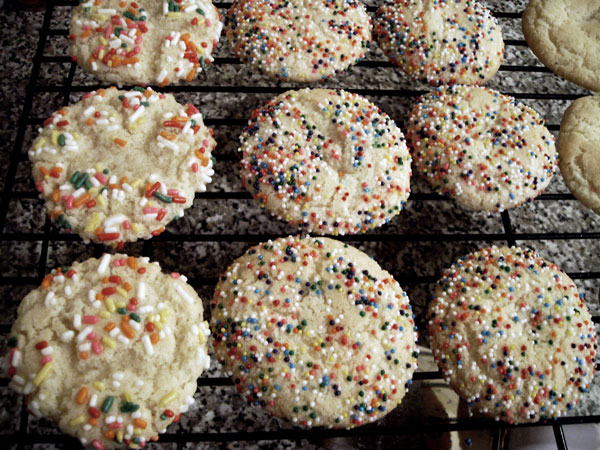
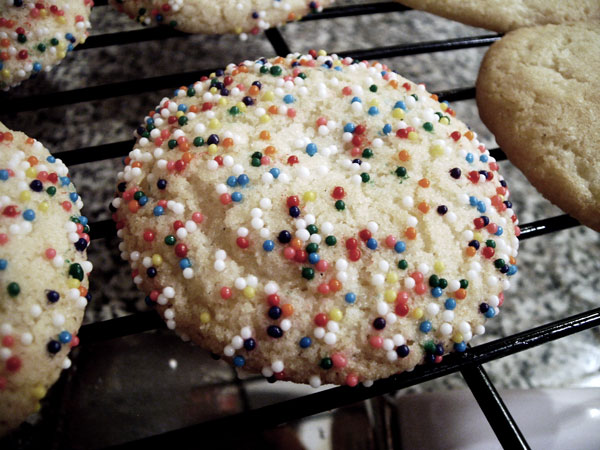
The little balls of sprinkle-covered dough look like donut holes, don't they? So cute. I tried both nonpareils and jimmies, to see which I liked better. Surprisingly, just the difference in sprinkles made a difference in how the cookies baked and tasted. The ones rolled in jimmies turned out much softer, and had a more uneven covering of sprinkles in the end. The ones rolled in nonpareils had a more even coating of sprinkles, and they turned out much sturdier. The ones with nonpareils had the flavor I was searching for, and I was so happy! My boyfriend, however, preferred the ones with jimmies. Go figure!

So what is it about this recipe that hit the spot so well this time? I've always wondered if the cream of tartar in snickerdoodle recipes changes the flavor at all, even though I know it is mostly used to give the cookies a bit of spread and fluff. These also have some shortening in them, which I can definitely taste as different than if I had used all butter. I think the original recipe calls for all shortening, but I prefer half butter and half shortening in mine. Also, surprisingly, I think the nonpareils added a lot of that nostalgic flavor I was looking for. They introduce extra crunch and a hint of sweetness in the corners of my mouth. Perfect.


The recipe makes a lot of dough (about 4 dozen 3-inch-diameter cookies), so I took half of it and rolled it up, so I can unfreeze it to slice and bake later! If you'd like to do the same, I've got a great tip for getting your rolled cookie dough shaped perfectly. I used to always struggle with rolling my cookie dough, because it was uneven and lumpy. Here's how to make it perfectly round, for uniform cookies!

Rolling Cookie Dough into a Log:
  1. Set out a large sheet of wax paper.
  2. Arrange your cookie dough in a general log shape, along the middle of the wax paper.
  3. Wrap the top of the wax paper over the log of dough so it is covered completely.
  4. Get a straight edge (like a metal ruler) and press it up against the bottom of the log of dough, on top of the wax paper.
  5. Holding the ruler in place, pull gently on the bottom piece of wax paper ONLY. This will pull the paper taut and in the process it will squeeze the cookie dough into a nice, rounded shape.
  6. When your dough is the diameter you want, remoe the ruler and finish wrapping up the dough with the wax paper, and twist the ends closed. I like to write the type of dough and date on the outside so I'll remember what it is when I grab it from the freezer later.

Now, if you'd like to make some of your own sugar cookies / snickerdoodles, here's the recipe I used. This is probably one of my most popular cookies around the holidays. Everyone I share them with always comes asking for more, and nobody can tell they're gluten-free!

Drop or Slice-and-Bake Sugar Cookies / Snickerdoodles

What you'll need:
  • 1/2 cup butter, softened
  • 1/2 cup shortening
  • 1 1/2 cups sugar
  • 2 large eggs
  • 2 tsp vanilla extract
  • 2 3/4 cup GF all-purpose flour*
  • 2 tsp cream of tartar
  • 1 tsp baking soda
  • 1/4 tsp salt

Preparation:
  1. Preheat oven to 400° F and line baking sheets with parchment paper.
  2. Mix the butter and shortening in your kitchenaid with the paddle attachment until smooth and well-blended.
  3. Add the sugar and mix until well blended.
  4. Add the eggs one at a time and mix well after each addition.
  5. Add the vanilla and mix well.
  6. In a separate bowl, whisk together the dry ingredients.
  7. Add the flour mixture into the wet mixture. I did this in about 3 additions, so it wasn't a ton of flour all at once. Mix until well blended.
  8. Roll the dough into balls (about the size of a donut hole) and roll them in your choice of sprinkles, sugar, or cinnamon-sugar mixture (or nothing at all - that tastes great, too!). Place them on baking sheet about 2 inches apart.
  9. Bake for 8-10 minutes. I find the ones rolled in jimmies take a bit longer to bake, and they still come out softer. 9 minutes seems to be about the magic number for all different variations. If you like your cookies a little crispier, go for 10-11 minutes.


If you intend to roll and freeze this dough for slice-and-bake action later, I suppose you can just set them on the baking sheet and top (and bottom?) them with sprinkles or cinnamon sugar.

*My GF all-purpose flour mixture consists of 1 part brown rice flour, 1 part white rice flour, 1/3 part tapioca starch, 2/3 part potato starch, and 1/2 tsp xanthan gum per cup of flour.

Enjoy~

21 August 2010

Mini Brownie Cupcakes


As much as I love pastry, it just can't pay my bills yet, so by day I work in GIS doing nerdy geo-stuff for a small training and consulting company. This week, all of my co-workers were able to get together (which is a rare occurrence, because we are all off at different sites and in different cities). They have got to be one of the most awesome groups of people I've ever had the privilege to work with. So, to celebrate the occasion, I baked them goodies!


I decided on miniature brownie cupcakes because they're cute, bite-size, and fun to decorate. Also, I love making these brownies because they are so gooey and delicious and you can't even tell that they're gluten-free! I dipped them in some of my trusty dark chocolate ganache and topped them off with some vanilla buttercream and rainbow nonpareils.

So much fun and so tasty!