Showing posts with label gluten-free. Show all posts

23 December 2010

Gingerbread Stars

We had a little holiday luncheon at my office last week, so I figured that would be a good time to bring some cookies! I'd been wanting to make gingerbread cookies all month, and here was a perfect opportunity.


I knew I wanted to make stars, because they're pretty, and I can make smaller, bite-sized ones easily. I also didn't have much time, so I wanted something I could decorate quickly. I found the most adorable sprinkles at Target: red jimmies with white candy cane shapes, red nonpareils with green holly leaves, and green jimmies with white snowflakes. I also had a nice big jar of "holiday" nonpareils, basically green, red, and white mixed together. And I had some silver, chunky sprinkles leftover from the time I made geode cupcakes!


Gingerbread Cookies
(adapted from this recipe)

  • 2.5 tbsp dark corn syrup
  • 2.5 tbsp maple syrup
  • 2.5 tbsp packed dark brown sugar
  • 2.5 tbsp white sugar
  • 1 tbsp ground ginger
  • 1.5 tsp ground cinnamon
  • 1/2 tsp ground allspice
  • 1/2 tsp ground cloves
  • 1 tsp baking soda
  • 1 stick (1/2 cup) unsalted butter, cut into tablespoon pieces
  • 1/2 a large egg, lightly beaten
  • 2 cups gluten-free all-purpose flour
  • 1/4 teaspoon salt
  1. Bring corn syrup, maple syrup, sugars, and spices to a boil in a 4- to 5-quart heavy saucepan over moderate heat, stirring occasionally, and remove from heat. Stir in baking soda (mixture will foam up), then stir in butter 3 pieces at a time, letting each addition melt before adding next, until all butter is melted. Add egg and stir until combined, then stir in most of the flour (leave about 2 tbsp aside) and salt.
  2. Preheat oven to 325°F.
  3. Transfer dough to a lightly floured surface and knead, dusting with as much of remaining 2 tbsp flour as needed to prevent sticking, until soft and easy to handle, 30 seconds to 1 minute.
  4. Roll out dough about 1/8-inch thick between 2 sheets of wax paper. Place on a flat surface (cutting board or cookie sheet) and refrigerate for about 10-15 minutes. Cut out as many cookies as possible with cutters and carefully transfer onto parchment-lined baking sheets, arranging them about 1 inch apart.
  5. Bake cookies in upper and lower thirds of oven, switching position of sheets halfway through baking, until edges are slightly darker, 10 to 12 minutes total (watch carefully toward end of baking; cookies can burn easily). Transfer cookies to racks to cool completely. Make more cookies with remaining dough and scraps (reroll once).
  6. Once cooled, decorate as desired.


Royal Icing

  • 3 cups powder sugar, sifted
  • 2 large egg whites
  • 2 tsp lemon juice 
  • 1 tsp almond extract
  1. Mix everything in your Kitchenaid with the paddle attachment on low to low-medium speed until it's smooth and will form soft peaks, about 5 minutes.
  2. Add colors if necessary. Keep covered with a damp paper towel or plastic wrap when not using.
  3. Pipe onto cookies as desired.

 I packaged them up and brought them to my office, then set them out on display for everyone. They loved them and I only had a couple left over to bring home. Yay!

31 October 2010

Sugar Cookies From My Childhood


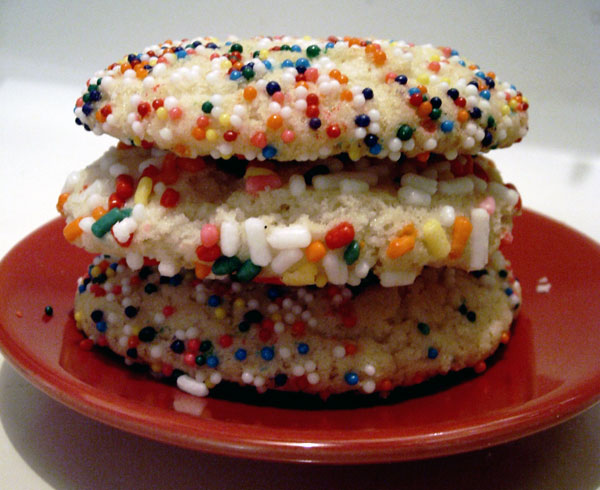
Ever since I was a little girl, I have been in love with sugar cookies. When I would go to the grocery store with my mom, the bakery would give kids a free cookie. I always chose the sugar cookies, preferably with sprinkles. As I grew older, my love for sugar cookies did not fade, but it became harder to find that perfect, nostalgic sugar cookie. The pre-made cookie doughs, or the cooke dough mixes, you can buy at the grocery store never tasted the same. Every from-scratch recipe I tried was never quite right, and way too many of them involved lemon. Am I the only one that thinks lemon flavor has no place in a pristine sugar cookie?!

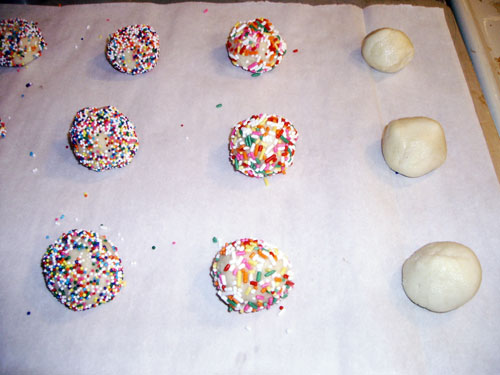
This week, I got a little craving for sugar cookies, and though these days I normally go for my super favorite - decorated shortbread-like sugar cookies (like Gianna's heavenly creations) - this time I wanted the cookies from my youth. I decided to try a little experiment and see if I could better replicate those nostalgia-inducing sugar cookies. I whipped out my snickerdoodle recipe, but instead of rolling the dough in cinnamon and sugar, I rolled it in sprinkles!


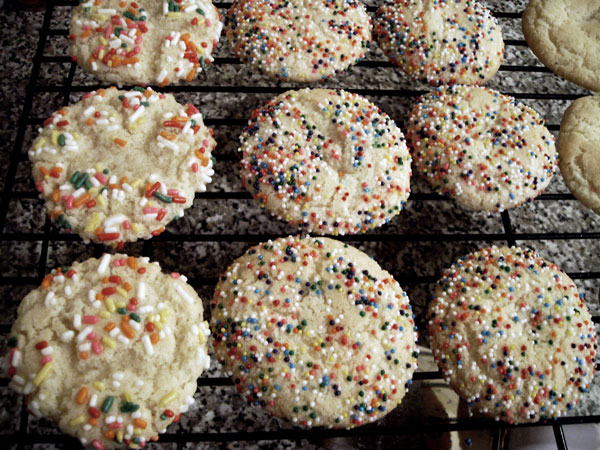
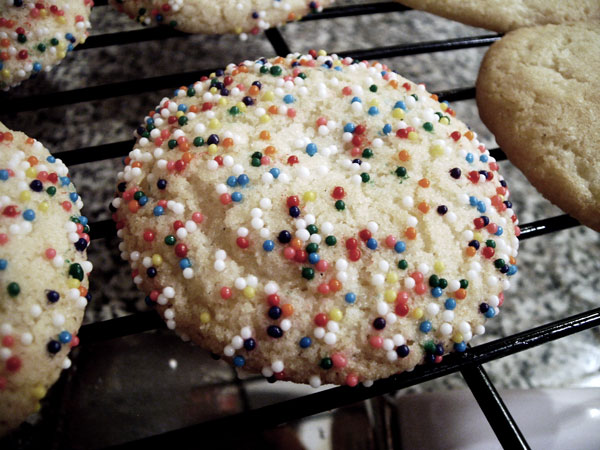
The little balls of sprinkle-covered dough look like donut holes, don't they? So cute. I tried both nonpareils and jimmies, to see which I liked better. Surprisingly, just the difference in sprinkles made a difference in how the cookies baked and tasted. The ones rolled in jimmies turned out much softer, and had a more uneven covering of sprinkles in the end. The ones rolled in nonpareils had a more even coating of sprinkles, and they turned out much sturdier. The ones with nonpareils had the flavor I was searching for, and I was so happy! My boyfriend, however, preferred the ones with jimmies. Go figure!

So what is it about this recipe that hit the spot so well this time? I've always wondered if the cream of tartar in snickerdoodle recipes changes the flavor at all, even though I know it is mostly used to give the cookies a bit of spread and fluff. These also have some shortening in them, which I can definitely taste as different than if I had used all butter. I think the original recipe calls for all shortening, but I prefer half butter and half shortening in mine. Also, surprisingly, I think the nonpareils added a lot of that nostalgic flavor I was looking for. They introduce extra crunch and a hint of sweetness in the corners of my mouth. Perfect.


The recipe makes a lot of dough (about 4 dozen 3-inch-diameter cookies), so I took half of it and rolled it up, so I can unfreeze it to slice and bake later! If you'd like to do the same, I've got a great tip for getting your rolled cookie dough shaped perfectly. I used to always struggle with rolling my cookie dough, because it was uneven and lumpy. Here's how to make it perfectly round, for uniform cookies!

Rolling Cookie Dough into a Log:
  1. Set out a large sheet of wax paper.
  2. Arrange your cookie dough in a general log shape, along the middle of the wax paper.
  3. Wrap the top of the wax paper over the log of dough so it is covered completely.
  4. Get a straight edge (like a metal ruler) and press it up against the bottom of the log of dough, on top of the wax paper.
  5. Holding the ruler in place, pull gently on the bottom piece of wax paper ONLY. This will pull the paper taut and in the process it will squeeze the cookie dough into a nice, rounded shape.
  6. When your dough is the diameter you want, remoe the ruler and finish wrapping up the dough with the wax paper, and twist the ends closed. I like to write the type of dough and date on the outside so I'll remember what it is when I grab it from the freezer later.

Now, if you'd like to make some of your own sugar cookies / snickerdoodles, here's the recipe I used. This is probably one of my most popular cookies around the holidays. Everyone I share them with always comes asking for more, and nobody can tell they're gluten-free!

Drop or Slice-and-Bake Sugar Cookies / Snickerdoodles

What you'll need:
  • 1/2 cup butter, softened
  • 1/2 cup shortening
  • 1 1/2 cups sugar
  • 2 large eggs
  • 2 tsp vanilla extract
  • 2 3/4 cup GF all-purpose flour*
  • 2 tsp cream of tartar
  • 1 tsp baking soda
  • 1/4 tsp salt

Preparation:
  1. Preheat oven to 400° F and line baking sheets with parchment paper.
  2. Mix the butter and shortening in your kitchenaid with the paddle attachment until smooth and well-blended.
  3. Add the sugar and mix until well blended.
  4. Add the eggs one at a time and mix well after each addition.
  5. Add the vanilla and mix well.
  6. In a separate bowl, whisk together the dry ingredients.
  7. Add the flour mixture into the wet mixture. I did this in about 3 additions, so it wasn't a ton of flour all at once. Mix until well blended.
  8. Roll the dough into balls (about the size of a donut hole) and roll them in your choice of sprinkles, sugar, or cinnamon-sugar mixture (or nothing at all - that tastes great, too!). Place them on baking sheet about 2 inches apart.
  9. Bake for 8-10 minutes. I find the ones rolled in jimmies take a bit longer to bake, and they still come out softer. 9 minutes seems to be about the magic number for all different variations. If you like your cookies a little crispier, go for 10-11 minutes.


If you intend to roll and freeze this dough for slice-and-bake action later, I suppose you can just set them on the baking sheet and top (and bottom?) them with sprinkles or cinnamon sugar.

*My GF all-purpose flour mixture consists of 1 part brown rice flour, 1 part white rice flour, 1/3 part tapioca starch, 2/3 part potato starch, and 1/2 tsp xanthan gum per cup of flour.

Enjoy~

28 September 2010

Glow Gluten Free Cookies (Review)


Glow Gluten Free Cookies!

Thanks to Kim at Age of Autism I was one of the lucky winners of a whole set of Glow Gluten Free cookies! Both Kim and Jill (from Glow GF) were so sweet to communicate with, and the cookies arrived really quickly. I wish I could have been just as timely as posted this review a lot sooner - I'm sorry it took me so long, ladies!

When I opened the box, I was amazed to find not just one sample of cookies, but four different boxes of cookies inside! My boyfriend and I got to sample the Chocolate Chip, Double Chocolate Chip, Snickerdoodle, and Gingersnap cookies! Yes -- ALL of their flavors. How awesome is that? And aren't the boxes SO cute?! They fit seven cookies inside, wrapped in a second layer of freshness protection.

One thing I love about these cookies is that not only are they gluten free, but they are also preservative free (and also casein and trans fat free!). As a baker, I have a strong love of whole, natural ingredients used in my foods, so I love to see the same care put into the baked goods that I buy. And as I am wont to do with ALL my foods these days, one of the first things I did was read the ingredients panel. I have to hand it to Glow Gluten Free -- you have convinced me that baked goods using bean flour CAN taste good! This is the first experience I have had with bean flours that has been a positive one, so that is saying something!

Glow Gluten Free Cookies!

These cookies were yummy! The gingersnaps were the chewiest of the bunch, and they had that familiar gingerbread flavor and texture. Folks, the chocolate chip? They were reminiscent of Chips Ahoy! in a good way, only these were a bit chewier and had a more robust flavor. I think the chocolate Glow GF uses much be top notch, because I could taste the quality in the chocolate chip cookies. And the double chocolate chip? SO chocolately and really flavorful. I think these might have been my favorite. Snickerdoodles are one of my favorite holiday cookies, and these deliver. They're crispy (which I enjoy) and they leave that amazing, zingy aftertaste that makes my mouth happy even when the cookie is all gone.

All in all, I'd say these are some of the best gluten-free cookies I've tasted so far. If you see these on the shelf at the grocery store - pick them up! Unfortunately, I haven't seen these in my area yet, and if you're having the same trouble, don't fret. Just buy them online!

(You can also find Glow Gluten Free on Facebook and twitter.)

10 September 2010

Strawberry Basil Pound Cake

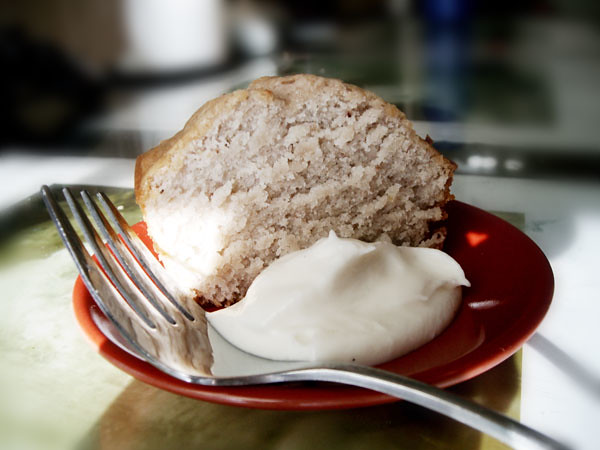
gluten-free strawberry basil poundcake

This week, I was gifted with so many things that I just knew I needed to show them off! First, some lovely girls from the church across the street were walking around our neighborhood handing out bags of fresh basil and oregano from their community garden! Isn't that awesome? It smelled SO good, folks.

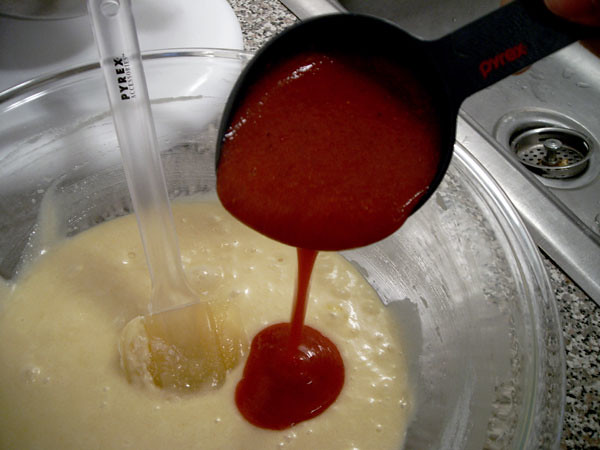
I was also a lucky recipient of some bakeware tools from Pyrex, thanks to Foodbuzz! They sent me some magnetic measuring cups, magnetic measuring spoons, and a large glass mixing bowl. Guys, I can't tell you how happy I am with these items. The cups and spoons are shaped with a little spout on them for easy scooping and pouring, and their magnets make them SO easy to keep together. The mixing bowl is the perfect size for mixing by hand, and my rubber spatula is pretty much in love with its smooth interior. Yay, thank you Pyrex and Foodbuzz!

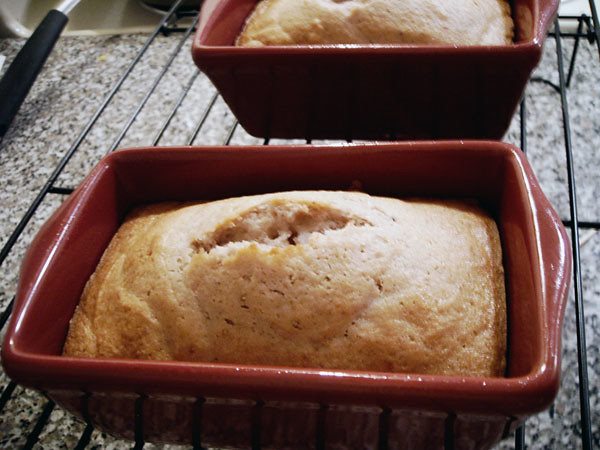
And thanks to the suggestion of a friend, I decided to make a strawberry and basil pound cake with all of my new stuff! Luckily I already had some strawberry puree that I'd been planning to use for something else. And I have just bought the most adorable mini loaf pans at the craft store!

This recipe makes four small (7 oz) pound cakes, or one large pound cake.

cake batter and strawberry puree

Ingredients

  • 1 cup sugar
  • 5 tbsp butter, melted
  • 4 eggs
  • 1 cup gluten-free all-purpose flour*
  • generous 1/4 tsp baking powder
  • pinch salt
  • generous 1/3 cup strawberry puree
  • 2 fresh basil leaves, finely chopped

*My GF flour mixture consists of 3 parts brown rice flour, 3 parts white rice flour, 2 parts potato starch, 1 part tapioca starch, and 1/2 tsp xanthan gum per cup of flour. The original recipe called for cake flour, which is fine, too, but for a gluten-free recipe, I prefer not to use cake flour most of the time.

Genovieve

Preparation

  1. Preheat oven to 325° F and spray your loaf pans with cooking spray.
  2. Combine the flour, baking powder, and salt in a bowl and set aside.
  3. Stir the butter and sugar until well mixed (feel free to use your kitchenaid for this, but if you don't have one, hand mixing works beautifully).
  4. Add the eggs, one at a time, mixing well between each addition.
  5. Add the flour mixture slowly, mixing well until it is cohesive.
  6. Add the strawberry puree and basil and mix until well combined.
  7. Pour into pans (for my mini pans it was about 1/2-cup batter per pan - it made 4 cakes).
  8. Bake for 30-35 minutes, or until a toothpick comes out clean.

gluten-free strawberry basil poundcake

Serving and Eating

Friends, this cake is so good that my boyfriend can't stop eating it! I suggest that you serve it with some vanilla cream (recipe here), or even a nice strawberry glaze on top. The strawberry flavor in this cake isn't overwhelming, but the entire combination is a sweet, gently spicy, soft cake.

[The photo at the top of this blog has been entered in the Gluten Free Photo Contest!]

05 September 2010

Financiers with Vanilla Cream

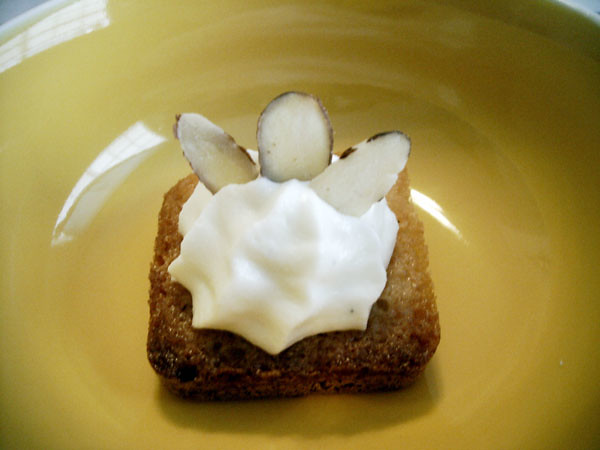
gluten-free financier with vanilla cream

When I was in pastry school, I became entranced with the financiers we made there. Never before had I tasted anything made with buerre noisette, and I had fallen in love. Their crispy outsides. Their soft, almondy center. If I wasn't careful, I'd find myself eating way too many of them when they were set out in the student cafe.

I've figured it's about time I made a gluten-free version, which should be pretty easy since there isn't much gluten in them to begin with. I have a small silicone mold that I bought a while back, and I thought it would be perfect for these financiers. It has square molds, and I thought that would perhaps be pretty, compared to the usual long rectangle shape of financiers.

First time around, I filled the molds almost all the way to the top, and after baking them twice as long as directed, they were still raw in the bottom. I had to throw my entire first batch in the trash. Boo! :( So, I've learned a couple of things while making them, and I've included these tips in the recipes below.

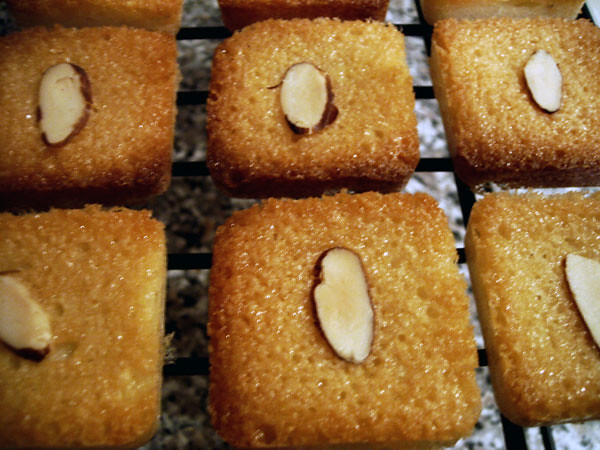
gluten-free financiers


Financiers

Ingredients
  • 100 grams TPT (50 grams almond flour, 50 grams sugar, mixed well)
  • 170 grams powdered sugar, sifted
  • 50 grams all-purpose gluten-free flour*, sifted
  • 130 grams egg whites (about 4.5 large eggs' worth)
  • 175 grams buerre noisette (brown butter)
Preparation
  1. Preheat the oven to 375 degrees F.
  2. Melt the butter on the stove on low heat. Boil until the butter begins to separate, and the solids sink to the bottom and turn brown. Remove quickly from heat and pour through a sieve or cheesecloth into another container to cool. Let cool to at least 40 degrees C (85 degrees F). It is important to keep a close eye on this because it can begin to burn very quickly. Pouring it through a sieve will remove all of the solids that you don't want in your buerre noisette.
  3. Whisk together all of the dry ingredients until they are well incorporated. Then put the dry mixture in your kitchenaid with the paddle attachment.
  4. Gently whisk the egg whites a little, and then add them to the dry mixture in the kitchenaid. Turn on low-medium speed and mix well.
  5. With the mixer on low speed, slowly pour the cooled brown butter into the kitchenaid and allow it to mix until the butter is well incorporated.
  6. Brush the molds with a little bit of leftover brown butter or spray with cooking spray. If using a silicone mold, place it on a flat baking sheet before filling it. If you do not have silicone molds, you can also use mini tart molds or mini muffin tins.
  7. Pour into a piping bag with a medium-sized round tip and pipe into the molds. If the molds are deep, like mine, be sure not to pour more than 1/8-inch or so of batter into each mold. When filled, tap the mold against the counter to settle the contents evenly.
  8. Bake for 4-5 minutes, then remove from oven and place an almond slice (or berry, if you like) on each. Then put it back in the oven for another 4-5 minutes. The baking time will vary depending on how much batter is in your molds, and their material. I believe my mold is a bit thicker than the ones we used at school, so I actually had to bake mine for about 20 minutes total. Just continue watching them, and add a couple of minutes at a time, until they are nicely browned on the top. Then remove them from the oven to cool on a rack.
*My all-purpose flour mixture consists of 3 parts brown rice flour, 3 parts white rice flour, 2 parts potato starch, 1 part tapioca starch, and 1/2 tsp of xanthan gum per cup of flour.

Here's the part where I ate a couple, because they're just so hard to resist. The powdered sugar in the recipe gives them a distinct crispy, chewy edge that is so familiar In a lot of French baking.

While they're cooling, you can prepare the cream!

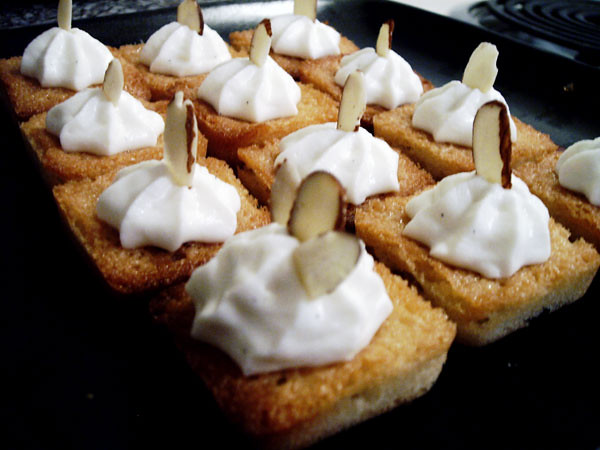
gluten-free financiers with vanilla cream


Vanilla Whipped Cream Frosting

Ingredients
  • 2 ounces cream cheese, softened
  • 2 tbsp sugar
  • 1/2 tsp vanilla extract
  • 1/2 cup heavy whipping cream
Preparation
  1. To make sure your cream cheese is softened enough, feel free to put it in the kitchenaid with a paddle for a minute or two.
  2. Switch to the whisk attachment and add the sugar and vanilla. Mix until smooth and creamy. You'll probably need to scrape the sides with a rubber spatula a few times during the process.
  3. Once it is well mixed, set the mixer to low and slowly pour in the heavy whipping cream.
  4. Continue whipping (you may want to up the speed a little) until it is well mixed and the cream forms stiff peaks. Again, you'll probably want to scrape the sides a few times during the process.
  5. When ready, prepare in a piping bag with your desired tip. Pipe onto each financier and garnish with an almond slice.
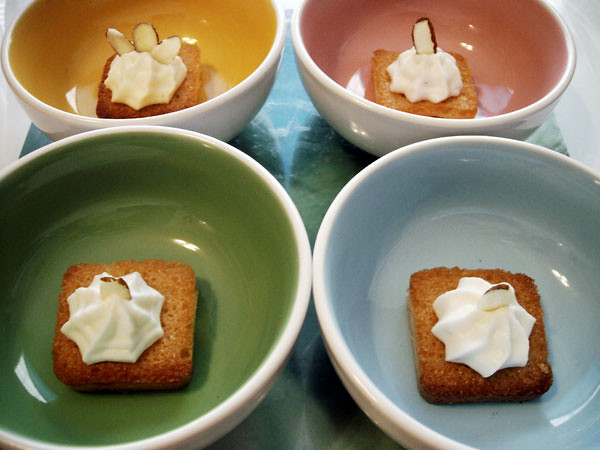
Here's the part where I rushed to take photos of them so I could hurry up and eat them! The soft, smooth texture of the cream really sets off the chewiness of the financiers, and the flavors complement each other in such a delicious way. Enjoy!

gluten-free financiers with vanilla cream

21 August 2010

Mini Brownie Cupcakes


As much as I love pastry, it just can't pay my bills yet, so by day I work in GIS doing nerdy geo-stuff for a small training and consulting company. This week, all of my co-workers were able to get together (which is a rare occurrence, because we are all off at different sites and in different cities). They have got to be one of the most awesome groups of people I've ever had the privilege to work with. So, to celebrate the occasion, I baked them goodies!


I decided on miniature brownie cupcakes because they're cute, bite-size, and fun to decorate. Also, I love making these brownies because they are so gooey and delicious and you can't even tell that they're gluten-free! I dipped them in some of my trusty dark chocolate ganache and topped them off with some vanilla buttercream and rainbow nonpareils.

So much fun and so tasty!

03 August 2010

CMYKake

Some of you may know what a big fan of colors I am. In fact, I even have the additive and subtractive color spectrums tattooed on my backs on my wrists. So it should come as no surprise that I was inspired to create a CMYK cake!

My plan was something like this:

But, as usual, my plan didn't come to fruition as fabulously as I hoped. However, it did turn out better than I expected, after a few setbacks.

The cake is entirely gluten-free and has SO MANY components that it actually took me three days to complete. And I had to re-bake the lemon cake because I didn't put enough baking powder in the first batch. Darnit! My process went something like this:

DAY 1
  • raspberry curd
  • lemon curd
  • blueberry puree
DAY 2
  • lemon cake
  • raspberry cake
  • blueberry cake
  • chocolate cake
  • chocolate ganache frosting (yes, the black is chocolate!)
DAY 3
  • re-bake lemon cake
  • blueberry Italian meringue
  • assemble and frost cake

By the end of it, I have to admit that I was rather exhausted, which would explain the not-perfectly-evenly-cut cake layers (resulting in the angled top) and the not-perfectly-smoothed frosting job. In the end, it looks cool, but it could have used a lot more filling in between the layers to make it taste better. Darn.

22 May 2010

Strawberry Pie

Well, I've been on this weird strawberry kick lately. After making strawberry icing for some chocolate cupcakes, and then strawberry cupcakes (sorry, no pics or blogs about those), my next adventure was a strawberry pie.

I borrowed this lovely recipe for the pie crust and changed it up to suit me. Well, by "changing it up" I mean that I substituted in my gluten-free flour. I also decided to do the first part of the process in my food processor since I don't have a pastry cutter, then did the second part as specified in the recipe. The dough turned out great!

I then borrowed this recipe for the pie filling. It looked so yummy before it was even baked!

Strawberry Pie - before baking

As the pie was busy baking, I noticed that it looked gorgeous and the crust smelled SO GOOD - like puff pastry!

strawberry pie in the oven

But after a while, I thought I smelled something burning. Indeed, the pie has burst somehow, and spilled all over the place! It has oozed out sweet red goo all over the tray I set it on and and overflowed down into the bottom of the oven, which was now busy bubbling like molten lava.

what a mess! :(

Yes, folks, my oven actually caught on fire. Luckily, my boyfriend knows how to use a fire extinguisher, and I happen to have one under the sink in my kitchen, so he quickly came to the rescue. Gosh, what a mess!

what a mess :(

I inspected the pie to see what caused the damage. All I can guess is that I didn't seal the crust well enough on this spot. Boo.

burst open

Luckily, the pie wasn't a total failure. It didn't get to cook is as long as specified, so it was still a bit runny inside. However, my boyfriend says it's delicious (I haven't even gotten to taste it yet).

gluten-free strawberry pie gluten-free strawberry pie

28 January 2010

Valentine Goat Cookies

It's probably quite apparent by now that I have a thing for cookies. A lesser known fact, however, is that I also have a thing for goats. So I was recently inspired to combine the two, adding a valentine theme into the mix.

I figured the best way to do this would be to make some decorated sugar cookies in the shape of goats. I decided to go with my trusty (and fricking fabulous, thank-you-very-much) gluten-free shortbread recipe and substitute goat butter instead of regular butter. (As always, click the images to see them bigger.)

goat butter

The goat butter turned out to be a lot more like shortening than I was expecting. It was white and very greasy, but it assimilated into the dough better than normal butter did. The dough had the proper consistency, though, and was a dream to roll and cut, so no problems there - yay!

cutting out goat-shaped cookies

They seemed to brown a bit quicker than with my normal recipe, so I baked them a bit less time than usual. They also spread a bit more than I was expecting, but they didn't lose too much of their goaty shape, so it's okay.

goat cookie after baking

Next day I set about decorating them! I decided on white goats and black goats, each with a little red heart (you know, for the Valentine part of this whole project). I used my entire jar of black powder coloring and my royal icing STILL wasn't black, so I had to make a quick run to the store to get some (real) gel coloring - thank goodness they hadn't closed yet!

goat cookie - white goat cookie - black

And, since I am devious, and goats are often associated with the devil, I decided to make a red devil-goat cookie, complete with a BLACK HEART. Isn't he cute?

goat devil cookie with black heart goat cookies

As for the taste? They're awesome. The cookies are softer than my normal shortbread recipe, but still sturdy enough that they don't fall apart in your hands (which is especially important in gluten-free baking). The royal icing keeps them together well, and the flavors work great together. Interestingly, the goat butter seems to have made these cookies taste a lot milkier than the normal cow-butter recipe.

11 October 2009

Pumpkin Muffins!

gluten-free pumpkin muffin with cream cheese frosting gluten-free pumpkin muffin with cream cheese frosting


Well, it was a lazy Sunday afternoon so I decided to make some pumpkin muffins. This was my first time making a gluten-free muffin recipe from scratch and they turned out amazingly well. I dressed them up with a little rosette of cream cheese frosting and some decorative cupcake liners.

I've added them to the Autumn line-up of goodies in my Etsy shop - yep, I'm back open for business. Check out the pumpkin muffins in my shop. Cheers!

07 September 2009

Vertical Layer Cake - First Try

Gluten-Free Mint Chocolate Cake with Vertical Layers


Have you seen Dimitrana's gorgeous cakes? I know, they're fantastic. And when I saw all of her incredible vertically layered cakes, I knew I had to give the technique a try.

I wanted to make a quick go of it, and concentrate on the technique, not the fanciness of the ingredients. So, I was excited to find that my local Super Target had a full stock of the new Betty Crocker gluten-free baking mixes! I chose the devil's food cake mix, and a couple of gluten-free frostings.

The cake is chocolate, of course, and I bought a white icing which I spiked with peppermint extract and green coloring. It was light, fluffy, and creamy, which was what I wanted... but that also made it slippery and a bit difficult to wrap into the swirly cake construction. After putting it together and refrigerating for a while, I iced it with the chocolate frosting and decorated with a bit of green frosting ( and some of the leftover mint cream).

My family loved it, and I was very pleased with the new Betty Crocker cake mix! As you can see, however, I still have some work to do regarding the structure of the cake layers. It was fun, though! :)

16 August 2009

Old Fashioned Coconut Cake


When I was a little over a year old, I met a new-born girl, and we became fast friends. We basically grew up together, and spent a lot of time at each other's houses over the years. Her mom was an amazing cook, and I always looked forward to her birthday parties for the food and cake alone! Several times, her mom graced our tastebuds with the most amazing coconut cake I'd ever had. Ever since then, I have been seeking out a coconut cake as incredible as this one. Sure, I could ask her for recipe, but...

Anyway, so when I saw an episode of Good Eats (I <3 Alton Brown and all his knowledge) that was solely dedicated to the long-lost old fashioned coconut cake, I became aglow with inspiration! For the past week, I have been soaking and fermenting my own home made coconut milk, coconut cream, and coconut extract -- all made with the fresh coconut that I cracked, drained, and shredded myself!


Needless to say, today was a long time coming. The recipe called for cake flour, and so I had to improvise with a gluten-free cake flour mixture that I'd never tried before. I was very pleased with the way the cakes came out, though. Fluffy and moist, and very flat across the top. I didn't even have to even out a bump across the top or anything!

I'd never made 7-minute frosting before, so this was a first, and I'm pretty pleased with the result. It's basically a rather soft version of Italian meringue, which is okay, but not really my thing. The cake went together really well, though, and I'm very pleased with how it turned out! The cake is soft, fluffy, and moist - but a tad bit gritty, which is disappointing. My parents swear that they LOVE the texture of the cake, and that it's got the perfect amount of sweetness. Personally, I felt it was a bit TOO sweet, but apparently I have really sensitive taste buds.


I had planned to put some lime curd in the middle, but forgot about it until it was too late to make any. Next time, I will definitely be including that element, though, as I think the tartness of it will offset the sweetness of the cake and frosting nicely. Overall, it was tasty, but not really what I was hoping for (that is to say, it's not really like the one my friend's mom used to make).

Please excuse that last photo. The cake had gotten kind of warm and the frosting was wilting a bit. :P

If you're interested, I pretty much followed this guide for the entire cake.

06 June 2009

Gluten-Free Cupcakes from Whole Foods!

Gluten-Free Vanilla Cupcakes from Whole Foods

I visited Whole Foods today in search of some potato starch and did a double-take when I passed by the small gluten-free baked goods section. Did I see... cupcakes? Cupcakes! Obviously, I had to try them out! They looked so pretty, too. :)

Gluten-Free Vanilla Cupcakes from Whole Foods

I kept them in my refrigerator all day and finally have had a chance to taste one. The cake is a bit on the crumbly side, but it is moist enough (it's a bit dry, but not overwhelmingly so) and full of vanilla flavor. It tastes like vanilla bean, too, not vanilla extract! The frosting is a lovely vanilla buttercream with a light hint of lemon. Really, when I take a bite of the cake and the vanilla together and I greeted by a lovely, full vanilla bean flavor. So enchanting!

You know, each time I take a bite, I think that it's too dry, but by the time I'm swallowing, I'm thinking of how amazing the vanilla flavor is. I'm not sure if I will buy these again, but I'm glad I got to taste them this time. :)

Gluten-Free Vanilla Cupcakes from Whole Foods

30 May 2009

Praline Experiments

This weekend I'm busy trying a few new things in between all of my standard baking. Since I needed to bake some pecan pralines anyway, I decided now would be a good time to experiment with a few ideas floating around in my head: butter pecan cookies and more shapely pecan pralines.

____________________________________

Butter Pecan Cookies - Take 1

butter pecan cookies - take 1
My idea for butter pecan cookies was to make a buttery shortbread cookie topped off with pecan praline. I used my robust sugar cookies as the base. These came out relatively well, but I only got a few cookies done before the praline got too cool and difficult to work with. They taste pretty good, but I'm not done perfecting this. I have another idea in store for the cookie part that will hopefully not only be delicious but less expensive in terms of ingredients.

____________________________________

Shapely Pecan Pralines

shapely pecan pralines
Next up was making my pralines look a bit more appetizing. These things are SO decadent and delicious and melt-in-your-mouth-amazing, but the only photo I had of them made them look kind of... bleh. So I set out to make some pretty ones.

My vision was to make them in mini muffin tins, because I really like that shape. The first attempt was a failure... again, the stuff cooled too quickly for me to handle properly. My second attempt was better -- at least I got it all into the pan before it cooled off. But THEN I couldn't get them out of the tin without demolishing them. That's when I went out and bought a silicone baking mold. The result was MUCH better. Pretty shaped pralines!!

shapely pecan pralines shapely pecan pralines

The only complaint I have is that the sides are dull, where they touched the mold. Not sure how to remedy that -- yet. Anyone have any ideas?