Showing posts with label royal icing. Show all posts

23 December 2010

Gingerbread Stars

We had a little holiday luncheon at my office last week, so I figured that would be a good time to bring some cookies! I'd been wanting to make gingerbread cookies all month, and here was a perfect opportunity.


I knew I wanted to make stars, because they're pretty, and I can make smaller, bite-sized ones easily. I also didn't have much time, so I wanted something I could decorate quickly. I found the most adorable sprinkles at Target: red jimmies with white candy cane shapes, red nonpareils with green holly leaves, and green jimmies with white snowflakes. I also had a nice big jar of "holiday" nonpareils, basically green, red, and white mixed together. And I had some silver, chunky sprinkles leftover from the time I made geode cupcakes!


Gingerbread Cookies
(adapted from this recipe)

  • 2.5 tbsp dark corn syrup
  • 2.5 tbsp maple syrup
  • 2.5 tbsp packed dark brown sugar
  • 2.5 tbsp white sugar
  • 1 tbsp ground ginger
  • 1.5 tsp ground cinnamon
  • 1/2 tsp ground allspice
  • 1/2 tsp ground cloves
  • 1 tsp baking soda
  • 1 stick (1/2 cup) unsalted butter, cut into tablespoon pieces
  • 1/2 a large egg, lightly beaten
  • 2 cups gluten-free all-purpose flour
  • 1/4 teaspoon salt
  1. Bring corn syrup, maple syrup, sugars, and spices to a boil in a 4- to 5-quart heavy saucepan over moderate heat, stirring occasionally, and remove from heat. Stir in baking soda (mixture will foam up), then stir in butter 3 pieces at a time, letting each addition melt before adding next, until all butter is melted. Add egg and stir until combined, then stir in most of the flour (leave about 2 tbsp aside) and salt.
  2. Preheat oven to 325°F.
  3. Transfer dough to a lightly floured surface and knead, dusting with as much of remaining 2 tbsp flour as needed to prevent sticking, until soft and easy to handle, 30 seconds to 1 minute.
  4. Roll out dough about 1/8-inch thick between 2 sheets of wax paper. Place on a flat surface (cutting board or cookie sheet) and refrigerate for about 10-15 minutes. Cut out as many cookies as possible with cutters and carefully transfer onto parchment-lined baking sheets, arranging them about 1 inch apart.
  5. Bake cookies in upper and lower thirds of oven, switching position of sheets halfway through baking, until edges are slightly darker, 10 to 12 minutes total (watch carefully toward end of baking; cookies can burn easily). Transfer cookies to racks to cool completely. Make more cookies with remaining dough and scraps (reroll once).
  6. Once cooled, decorate as desired.


Royal Icing

  • 3 cups powder sugar, sifted
  • 2 large egg whites
  • 2 tsp lemon juice 
  • 1 tsp almond extract
  1. Mix everything in your Kitchenaid with the paddle attachment on low to low-medium speed until it's smooth and will form soft peaks, about 5 minutes.
  2. Add colors if necessary. Keep covered with a damp paper towel or plastic wrap when not using.
  3. Pipe onto cookies as desired.

 I packaged them up and brought them to my office, then set them out on display for everyone. They loved them and I only had a couple left over to bring home. Yay!

15 November 2009

For Fun & Practice

This past week I went to class not only during nights like usual, but also two days during the morning classes. The morning class was working on sugar this week, so I got to practice with that some more. In the beginning, I didn't really like working with sugar (it's hot and finicky), but now that I've got the hang of it, I'm really starting to enjoy it. On Thursday, my instructor did a demo on how to make a bird with sugar, so I made one too! I followed his general demos, but changed things up a bit to suit my tastes. Here's the results:

pulled sugar bird pulled sugar bird - plumage closeup


And in my normal (night) class, when we finished up with the dessert buffet, my teacher made us practice our piping (again). This time I decided to try and appeal to what they really want us to do (instead of something I find more fun, like my mermaid cake). My teacher was pleased. I actually think my piping is getting a lot better. I took a picture for later reference when we have to make a cake to go on top of our croquembouches in a couple weeks.

piping practice

25 August 2009

Mermaid Wedding Cake

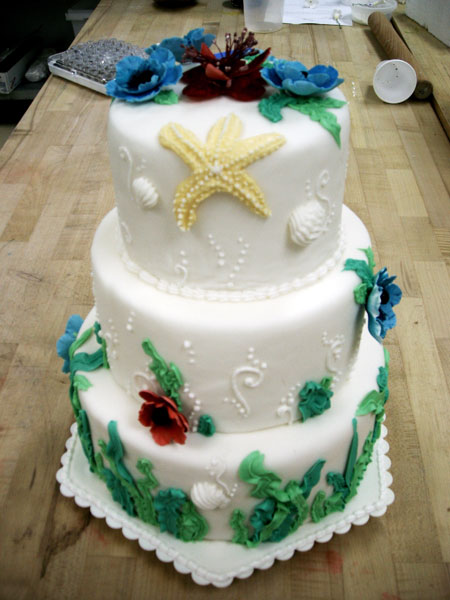
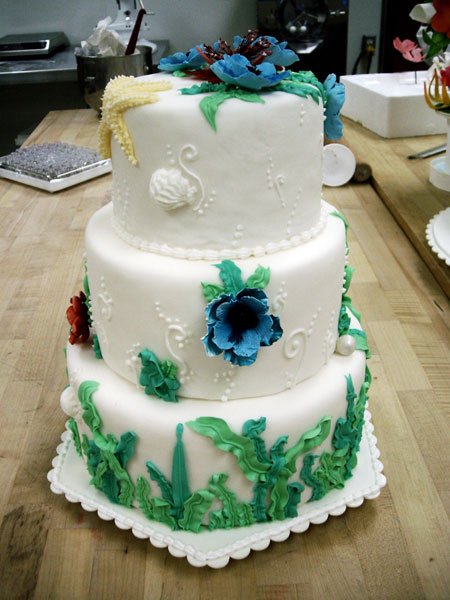
In my pastry class, we just finished our wedding cake project. My instructor had us practicing our royal icing piping for weeks before this project. Then during our 3-day prep time, he showed us how to make gum paste and rolling fondant. He showed us how to cover our cakes (delicious, styrofoam cakes) with the fondant, and how to make flowers out of gum paste. Then he basically set us to work, with three days to complete our cakes.

Mermaid Wedding Cake - front Mermaid Wedding Cake - back


A quick run-down on the details:
- 3 tiers, all must be covered in fondant (white fondant only)
- at least 2 kinds of piping
- at least 1 kind of flower
- everything except the flower wiring and pistil/stamens must be edible (which is amusing, since we were working on foam molds :P)

Of course, I didn't want to do some boring wedding cake. I'm not into wedding cakes at all, and most of the piping techniques (extension work?!) he showed us were boring, or not my style at all. So, naturally, I went with a mermaid theme!

Mermaid Wedding Cake - side Mermaid Wedding Cake - anemone closeup


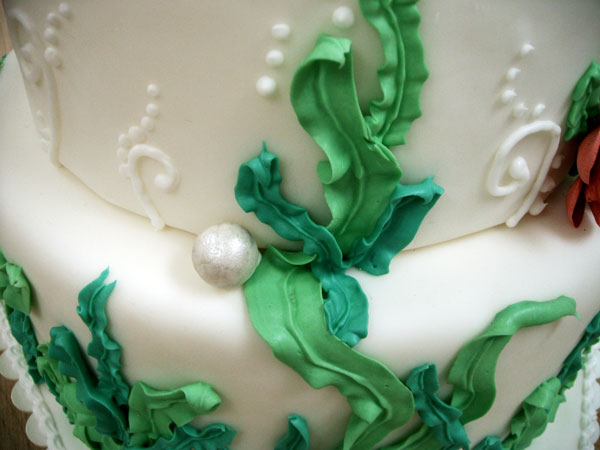
First off, I am extremely pleased with the colors for my seaweed. They are better than I could have hoped for, and using two different sized leaf tips gave a great effect! The white swirly, bubbly piping on the top 2 tiers was purely improv. I knew I needed another type of piping and I didn't want any more color (aside from the flowers), so I went with white. Again, I'm really happy with the results.

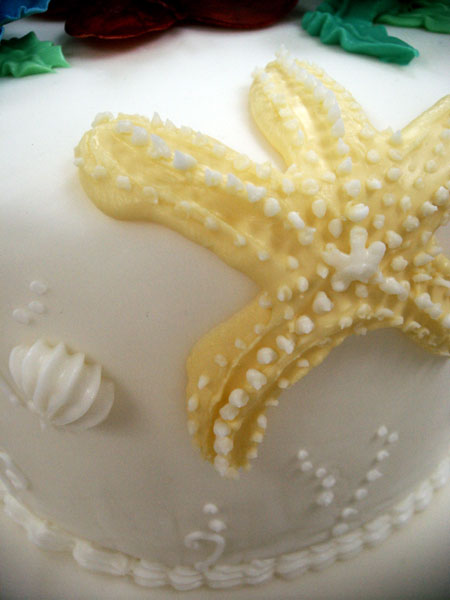
Mermaid Wedding Cake - starfish closeup Mermaid Wedding Cake - anemone closeup


My shining star (pun intended) actually turned out to be my little starfish! I wasn't really sure about the color, or how I was going to make it, and when I first began piping it, I was getting disappointed. I practiced first, but didn't think about the angle it was on, and some of the icing started drooping down. But luckily, it gave the starfish a more organic feel, and I had a lot of fun piping all the little white dots on top!

Mermaid Wedding Cake - anemones closeup Mermaid Wedding Cake - pearl closeup


As a fun little play on words, I decided to go with anemones for flowers. I would have LOVED to make anemone sea creatures, but it really didn't seem plausible with gum paste. So I went with some pretty blue anemone flowers, and a few red ones for a nice accent color. I also made a cute little pearl, just as a little something extra.

This project was a LOT more fun than I was expecting, and I think I am overall, the most pleased with my cake out of all the girls in my class. I really wish my flowers were a LOT better, but they were the best I could do, and for my first time making gum paste flowers, I think they're not half bad. Of course, this wasn't a traditional looking wedding cake, and my instructor didn't say much to me after the first night when he helped me do my fondant and work some of my flower middles. So who knows what kind of grade I'll actually get!