Showing posts with label cake. Show all posts

10 September 2010

Strawberry Basil Pound Cake

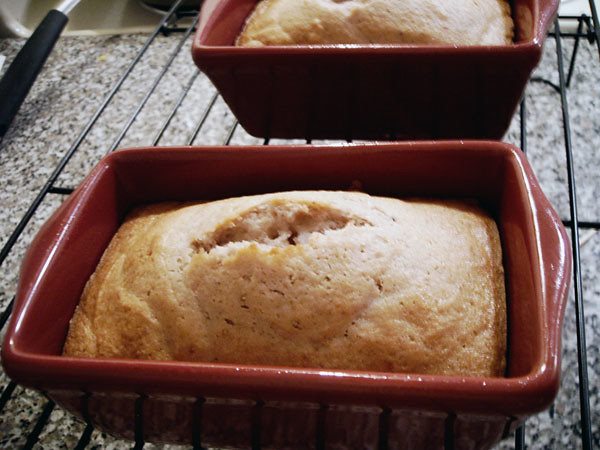
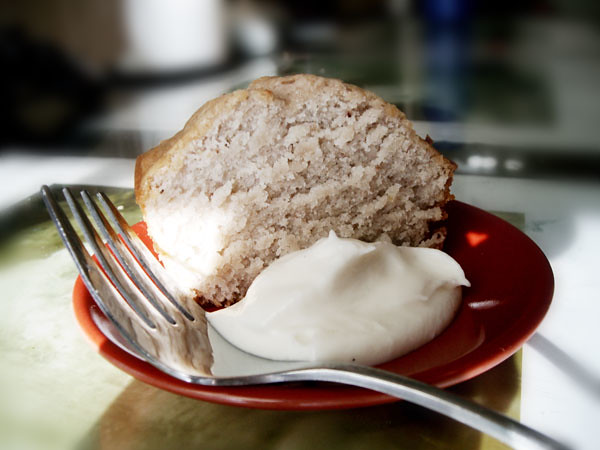
gluten-free strawberry basil poundcake

This week, I was gifted with so many things that I just knew I needed to show them off! First, some lovely girls from the church across the street were walking around our neighborhood handing out bags of fresh basil and oregano from their community garden! Isn't that awesome? It smelled SO good, folks.

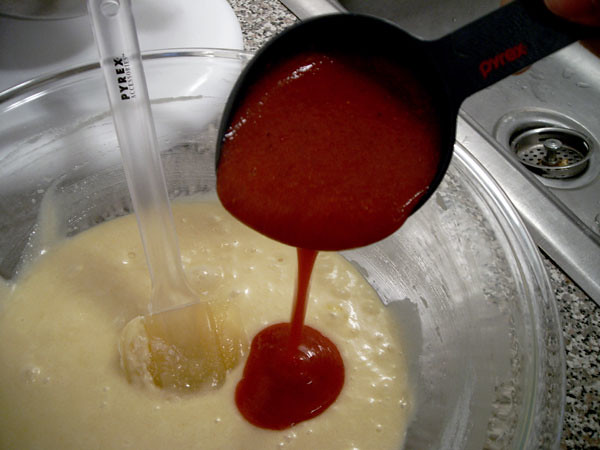
I was also a lucky recipient of some bakeware tools from Pyrex, thanks to Foodbuzz! They sent me some magnetic measuring cups, magnetic measuring spoons, and a large glass mixing bowl. Guys, I can't tell you how happy I am with these items. The cups and spoons are shaped with a little spout on them for easy scooping and pouring, and their magnets make them SO easy to keep together. The mixing bowl is the perfect size for mixing by hand, and my rubber spatula is pretty much in love with its smooth interior. Yay, thank you Pyrex and Foodbuzz!

And thanks to the suggestion of a friend, I decided to make a strawberry and basil pound cake with all of my new stuff! Luckily I already had some strawberry puree that I'd been planning to use for something else. And I have just bought the most adorable mini loaf pans at the craft store!

This recipe makes four small (7 oz) pound cakes, or one large pound cake.

cake batter and strawberry puree

Ingredients

  • 1 cup sugar
  • 5 tbsp butter, melted
  • 4 eggs
  • 1 cup gluten-free all-purpose flour*
  • generous 1/4 tsp baking powder
  • pinch salt
  • generous 1/3 cup strawberry puree
  • 2 fresh basil leaves, finely chopped

*My GF flour mixture consists of 3 parts brown rice flour, 3 parts white rice flour, 2 parts potato starch, 1 part tapioca starch, and 1/2 tsp xanthan gum per cup of flour. The original recipe called for cake flour, which is fine, too, but for a gluten-free recipe, I prefer not to use cake flour most of the time.

Genovieve

Preparation

  1. Preheat oven to 325° F and spray your loaf pans with cooking spray.
  2. Combine the flour, baking powder, and salt in a bowl and set aside.
  3. Stir the butter and sugar until well mixed (feel free to use your kitchenaid for this, but if you don't have one, hand mixing works beautifully).
  4. Add the eggs, one at a time, mixing well between each addition.
  5. Add the flour mixture slowly, mixing well until it is cohesive.
  6. Add the strawberry puree and basil and mix until well combined.
  7. Pour into pans (for my mini pans it was about 1/2-cup batter per pan - it made 4 cakes).
  8. Bake for 30-35 minutes, or until a toothpick comes out clean.

gluten-free strawberry basil poundcake

Serving and Eating

Friends, this cake is so good that my boyfriend can't stop eating it! I suggest that you serve it with some vanilla cream (recipe here), or even a nice strawberry glaze on top. The strawberry flavor in this cake isn't overwhelming, but the entire combination is a sweet, gently spicy, soft cake.

[The photo at the top of this blog has been entered in the Gluten Free Photo Contest!]
03 August 2010

CMYKake

Some of you may know what a big fan of colors I am. In fact, I even have the additive and subtractive color spectrums tattooed on my backs on my wrists. So it should come as no surprise that I was inspired to create a CMYK cake!

My plan was something like this:

But, as usual, my plan didn't come to fruition as fabulously as I hoped. However, it did turn out better than I expected, after a few setbacks.

The cake is entirely gluten-free and has SO MANY components that it actually took me three days to complete. And I had to re-bake the lemon cake because I didn't put enough baking powder in the first batch. Darnit! My process went something like this:

DAY 1
  • raspberry curd
  • lemon curd
  • blueberry puree
DAY 2
  • lemon cake
  • raspberry cake
  • blueberry cake
  • chocolate cake
  • chocolate ganache frosting (yes, the black is chocolate!)
DAY 3
  • re-bake lemon cake
  • blueberry Italian meringue
  • assemble and frost cake

By the end of it, I have to admit that I was rather exhausted, which would explain the not-perfectly-evenly-cut cake layers (resulting in the angled top) and the not-perfectly-smoothed frosting job. In the end, it looks cool, but it could have used a lot more filling in between the layers to make it taste better. Darn.

22 May 2010

World of Warcraft's Gooey Spider Cake

People often like to draw correlations between WoW and real life, and I'll have to admit that I am no exception. While a lot of gamers like to compare video games to things like war, strategy, and real-life interactions with other people, I prefer to take a slightly more sociopathic route. Being a reclusive pastry chef, I like to stay in my kitchen and bake~!

My newest endeavor is taking recipes from World of Warcraft and attempting to recreate them in my own kitchen. If you missed my first experiment, go see how my [Delicious Chocolate Cake] turned out. This time around I'll be doing another cake, but with more sinister ingredients: the [Gooey Spider Cake].

Recipe Assessment

Gooey  Spider Cake - recipe

Gooey  Spider Cake

Things to note about this recipe:
- It only has one ingredient: gooey spider legs
- Its result looks more like a pie than a cake

Mise en Place

With only one ingredient, this should have been pretty easy to prep. I'll tell you what, folks. I must have killed two dozen spiders (which takes a while for a holy paladin who doesn't do much damage) before I got enough [Gooey Spider Leg] drops to complete this recipe. Luckily, the last one I killed yielded exactly two [Gooey Spider Leg]s.

Gooey Spider Cake - gathering ingredients

You'd think that it'd be easy enough to get what I needed after only one spider, since they have eight legs and everything. I guess sometimes they're just not gooey enough. Or something.

On to the Baking

That wasn't so bad! And now, just to bake the cake.

Gooey Spider Cake - into the oven

I have to admit, I was a bit skeptical of this recipe, having only one ingredient, but I figured Blizzard wouldn't let me down so I decided to forge on with the baking.

Final Result

Gooey Spider Cake - out of the oven

Tada! Wow, that was way easier than I thought it would be. This WoW baking is pretty cool!

Gooey Spider Cake - sliced Gooey Spider Cake - slice

(If you'd like to learn about an alternate way to make this pie, er I mean, cake... check out this blog.)

14 March 2010

World of Warcraft's Delicious Chocolate Cake

Premises and Promises

In order to bridge the gap between World of Warcraft and my kitchen, I've decided to embark on a new endeavor to make WoW food in real life. That is to say that I will be taking in-game recipes and attempting to recreate them in my own kitchen.

There will, of course, be a certain amount of improvisation on my part, in order to make some of these (unrealistic) recipes work; however, I do intend to stick as closely to the game recipes as possible. As time goes on, I also intend to branch out into recipes from other video games, but in the beginning it will be purely WoW items. If there's one you'd like to suggest, please send me a PM.

Blizzard's Delicious Chocolate Cake

Delicious Chocolate Cake

I figured that a good place to start would be with a popular item from Burning Crusade days - the Delicious Chocolate Cake. (Since I am a pastry chef, I intend to stick to the baked goods, but we'll see where things go in the future.)

Recipe Assessment

Delicious Chocolate Cake - recipe
Things to note about this recipe:
  • Simple Flour, not cake flour - this means the cake will be light and fluffy.
  • Ice Cold Milk - this means the cake will be rich, especially in ratio to the flour
  • Mild Spices - perhaps this could be the chocolate? I'm not sure what to use for this.
  • Small Egg - high ratio of eggs-to-flour. This cake will be rich and thick after all.
  • Flask of Port - quite a large amount of alcohol, although this could be tasty.
  • Mageroyal - this could be lumped into the spices, or add an accent to the chocolate.
  • There is no chocolate listed in the ingredients. Interesting.
  • There is no sugar listed in the ingredients. Also interesting.
  • There are berries in the picture (below) but not in the recipe. Heh.

Image Assessment

The first thing that I noticed is the icon doesn't look anything like a chocolate cake. It looks like white cake with some sort of berry filling and green goo on top. I could decorate it to look like that, but let's see what the item looks like in-game.

Delicious Chocolate Cake - whole Delicious Chocolate Cake - slice

So in-game, the actual item looks (or is presumed to look) more like a chocolate cake with some berries on top. I'll shoot for this model because it seems more fitting for the name anyhow.

Kelley's Delicious Chocolate Cake

Now that I'd seen what the original recipe and cake look like, it was time for me to recreate this in my own kitchen. I decided to do this in the style used by Mythbusters. I'd make one cake using the exact recipe from the game (substituting spices/mageroyal as I see fit). Then I'd make another cake using the recipe but expanding it to make it an actual delicious chocolate cake.

Translated WoW Recipe

  • 8x Simple Flour = 2 cups flour (assuming 1 part = 1/4 cup)
  • 4x Ice Cold Milk = 1 cup milk (assuming 1 part = 2 tbsp)
  • 4x Mild Spices = 4 tbsp cocoa (assuming spices = chocolate)
  • 8x Small Egg = 4 extra-large eggs (cause who can find small eggs?)
  • Flask of Port = 1/2 cup port wine
  • 3x Mageroyal =1 tsp lavender (it's a flower, at least!)
I decided to go for the normal (non-French) mixing style and just mix the wet ingredients and then add the dry ingredients. The batter turned out looking pretty good.
Blizzard's Delicious Chocolate Cake - batter

I was a bit leery, however, that the recipe called for four eggs, but no leavening of any sort. Would the cake rise?
Blizzard's Delicious Chocolate Cake - baked Blizzard's Delicious Chocolate Cake - baked & sliced

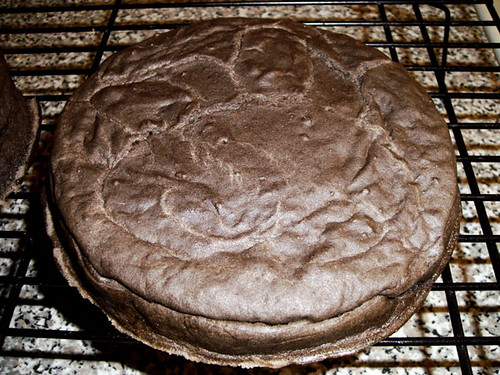
That's right, folks. The cake came out very flat and very dense.

So dense, in fact, that I decided to use it as a makiwara.
cake turned makiwara

It barely rose, meaning the final cake was about 1.5 inches in thickness. It had barely any flavor (thanks to there being no sugar in the recipe, Blizzard).

So. Almost total fail. Next it was time to try this with some revisions, because by now it was clear that I needed a real delicious chocolate cake.

Kelley's Revised Recipe

  • 8x Simple Flour = 1.75 cups flour
  • 4x Ice Cold Milk = 1 cup milk
  • 4x Mild Spices = .75 cup cocoa, 1 tsp baking powder, 1 tsp salt, 2 tsp baking soda
  • 8x Small Egg = 2 extra-large eggs + .5 cup vegetable oil
  • Flask of Port = 1/2 cup port wine + 1 tsp vanilla extract
  • 3x Mageroyal =1 tsp lavender (it's a flower, at least!)
  • MISSING SUGAR = 2 cups sugar
As you can see, I altered the recipe to include some leavening, some sugar, and a slight alteration of wet-to-dry ratio. I also replaced some of the flour with more cocoa. The batter turned out nice and dark, and had a bit more volume than the first recipe.
Kelley's Delicious Chocolate Cake - batter

The cakes rose beautifully, and I had no trouble at all removing them from the rings.
Kelley's Delicious Chocolate Cake - baked

I baked two cakes and cut them both in half in order to stack them. I used three for stacking and the other for tasting. The cake was chocolatey and moist, but the port was a bit... odd. I knew I would need a very tasty frosting in order to even out the flavors. And I was glad that the images showed berries on the cake, too.

The Delicious Chocolate Cake

I decided to use a chocolate fudge frosting to fill between the layers and on the top. I also used sliced strawberries in between the layers, and halved strawberries to garnish the top of the cake.
Kelley's Delicious Chocolate Cake - complete Kelley's Delicious Chocolate Cake - complete

So, the cake looked pretty, and actually rather WoW-ish. But... would it taste good? I sliced a piece and gave it a taste. The fudge frosting and strawberries were actually pretty perfect for balancing out the flavors. Yay~!
Kelley's Delicious Chocolate Cake - sliced Kelley's Delicious Chocolate Cake - sliced

Final Thoughts

Blizzard was on the right track with this recipe, but in actuality, it didn't turn out so well. Hint: if you're going to use the word delicious in the name of your cake, you had better put some sugar in it. I'd also recommend leaving the port wine out, and replacing it with something more tasty, like coffee or maybe even some KahlĂșa -- and less of it.

Oh, and by the way -- yes, it's completely gluten-free.

07 September 2009

Vertical Layer Cake - First Try

Gluten-Free Mint Chocolate Cake with Vertical Layers


Have you seen Dimitrana's gorgeous cakes? I know, they're fantastic. And when I saw all of her incredible vertically layered cakes, I knew I had to give the technique a try.

I wanted to make a quick go of it, and concentrate on the technique, not the fanciness of the ingredients. So, I was excited to find that my local Super Target had a full stock of the new Betty Crocker gluten-free baking mixes! I chose the devil's food cake mix, and a couple of gluten-free frostings.

The cake is chocolate, of course, and I bought a white icing which I spiked with peppermint extract and green coloring. It was light, fluffy, and creamy, which was what I wanted... but that also made it slippery and a bit difficult to wrap into the swirly cake construction. After putting it together and refrigerating for a while, I iced it with the chocolate frosting and decorated with a bit of green frosting ( and some of the leftover mint cream).

My family loved it, and I was very pleased with the new Betty Crocker cake mix! As you can see, however, I still have some work to do regarding the structure of the cake layers. It was fun, though! :)

25 August 2009

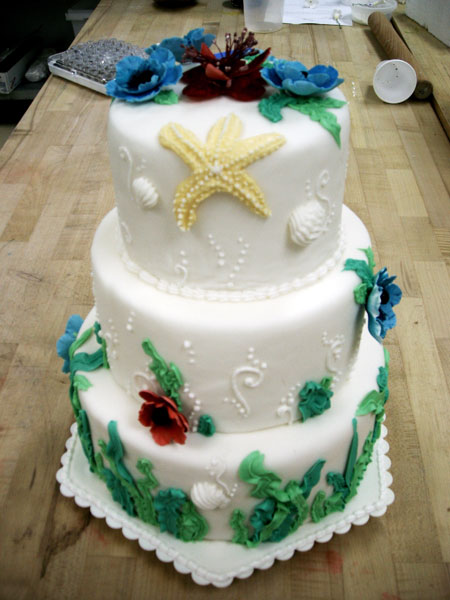
Mermaid Wedding Cake

In my pastry class, we just finished our wedding cake project. My instructor had us practicing our royal icing piping for weeks before this project. Then during our 3-day prep time, he showed us how to make gum paste and rolling fondant. He showed us how to cover our cakes (delicious, styrofoam cakes) with the fondant, and how to make flowers out of gum paste. Then he basically set us to work, with three days to complete our cakes.

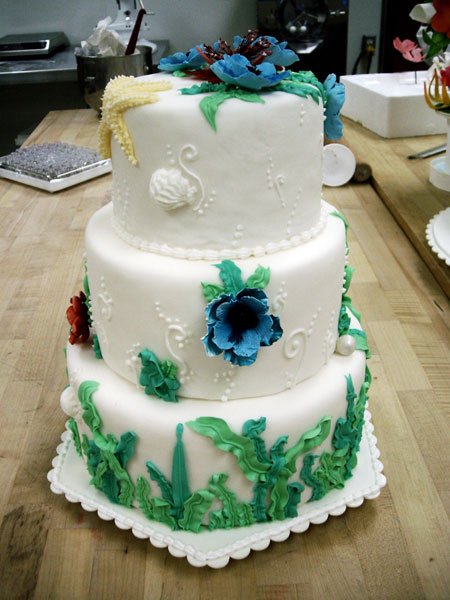
Mermaid Wedding Cake - front Mermaid Wedding Cake - back


A quick run-down on the details:
- 3 tiers, all must be covered in fondant (white fondant only)
- at least 2 kinds of piping
- at least 1 kind of flower
- everything except the flower wiring and pistil/stamens must be edible (which is amusing, since we were working on foam molds :P)

Of course, I didn't want to do some boring wedding cake. I'm not into wedding cakes at all, and most of the piping techniques (extension work?!) he showed us were boring, or not my style at all. So, naturally, I went with a mermaid theme!

Mermaid Wedding Cake - side Mermaid Wedding Cake - anemone closeup


First off, I am extremely pleased with the colors for my seaweed. They are better than I could have hoped for, and using two different sized leaf tips gave a great effect! The white swirly, bubbly piping on the top 2 tiers was purely improv. I knew I needed another type of piping and I didn't want any more color (aside from the flowers), so I went with white. Again, I'm really happy with the results.

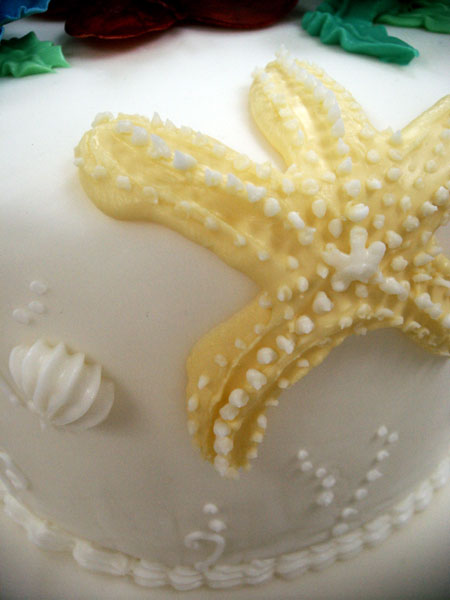
Mermaid Wedding Cake - starfish closeup Mermaid Wedding Cake - anemone closeup


My shining star (pun intended) actually turned out to be my little starfish! I wasn't really sure about the color, or how I was going to make it, and when I first began piping it, I was getting disappointed. I practiced first, but didn't think about the angle it was on, and some of the icing started drooping down. But luckily, it gave the starfish a more organic feel, and I had a lot of fun piping all the little white dots on top!

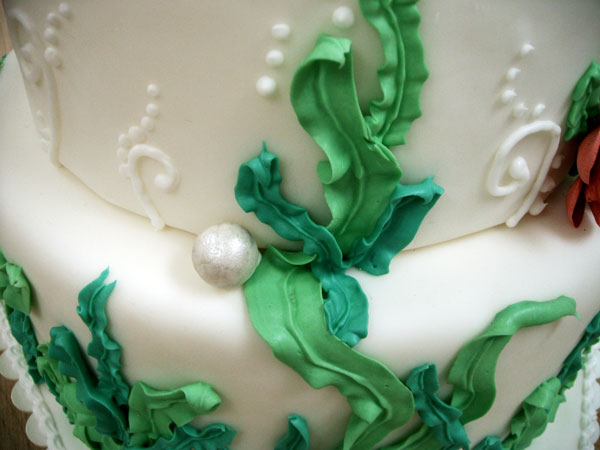
Mermaid Wedding Cake - anemones closeup Mermaid Wedding Cake - pearl closeup


As a fun little play on words, I decided to go with anemones for flowers. I would have LOVED to make anemone sea creatures, but it really didn't seem plausible with gum paste. So I went with some pretty blue anemone flowers, and a few red ones for a nice accent color. I also made a cute little pearl, just as a little something extra.

This project was a LOT more fun than I was expecting, and I think I am overall, the most pleased with my cake out of all the girls in my class. I really wish my flowers were a LOT better, but they were the best I could do, and for my first time making gum paste flowers, I think they're not half bad. Of course, this wasn't a traditional looking wedding cake, and my instructor didn't say much to me after the first night when he helped me do my fondant and work some of my flower middles. So who knows what kind of grade I'll actually get!

16 August 2009

Old Fashioned Coconut Cake


When I was a little over a year old, I met a new-born girl, and we became fast friends. We basically grew up together, and spent a lot of time at each other's houses over the years. Her mom was an amazing cook, and I always looked forward to her birthday parties for the food and cake alone! Several times, her mom graced our tastebuds with the most amazing coconut cake I'd ever had. Ever since then, I have been seeking out a coconut cake as incredible as this one. Sure, I could ask her for recipe, but...

Anyway, so when I saw an episode of Good Eats (I <3 Alton Brown and all his knowledge) that was solely dedicated to the long-lost old fashioned coconut cake, I became aglow with inspiration! For the past week, I have been soaking and fermenting my own home made coconut milk, coconut cream, and coconut extract -- all made with the fresh coconut that I cracked, drained, and shredded myself!


Needless to say, today was a long time coming. The recipe called for cake flour, and so I had to improvise with a gluten-free cake flour mixture that I'd never tried before. I was very pleased with the way the cakes came out, though. Fluffy and moist, and very flat across the top. I didn't even have to even out a bump across the top or anything!

I'd never made 7-minute frosting before, so this was a first, and I'm pretty pleased with the result. It's basically a rather soft version of Italian meringue, which is okay, but not really my thing. The cake went together really well, though, and I'm very pleased with how it turned out! The cake is soft, fluffy, and moist - but a tad bit gritty, which is disappointing. My parents swear that they LOVE the texture of the cake, and that it's got the perfect amount of sweetness. Personally, I felt it was a bit TOO sweet, but apparently I have really sensitive taste buds.


I had planned to put some lime curd in the middle, but forgot about it until it was too late to make any. Next time, I will definitely be including that element, though, as I think the tartness of it will offset the sweetness of the cake and frosting nicely. Overall, it was tasty, but not really what I was hoping for (that is to say, it's not really like the one my friend's mom used to make).

Please excuse that last photo. The cake had gotten kind of warm and the frosting was wilting a bit. :P

If you're interested, I pretty much followed this guide for the entire cake.

13 January 2009

Abundance of Inactivity?

Yes, yes, we've been absent for a while now. Well, you know what? We've been busy!

Mid-September I began a Baking & Pastry Arts program at Culinary Institute Alain & Marie LeNotre. I've been busy learning all kinds cool techniques, like:

and

and

(along with a gazillion other things).

Unfortunately in December I had to take a leave of absence due to some health issues, but I return at the end of February, so look forward to more for Kelley + LeNotre!