GF Cookie Girl
24 December 2010
Homemade Holiday Goodies
This year, I wanted to gift some homemade goodies as Christmas gifts. Pretty much all year long I've been prepping, with things like homemade vanilla extract and vanilla sugar. I got some awesome bottles with droppers for the vanilla, and some pretty jars for the sugar.
I also wanted to bake a couple things to give along with the extract and sugar, so I decided on my Texas pecan pralines. I'd also been wanting to try my hand at black & white cookies ever since my friend Amanda told me they existed. I decided Christmas was the perfect time to do it, and I even made some holiday versions: regular black & white (with vanilla glaze and chocolate glaze), black & red (raspberry glaze and chocolate glaze), and black & green (peppermint glaze and chocolate glaze). Yay!
I know, these pictures aren't the greatest, and I forgot to photograph the cookies before I packaged them all up, so these shots will have to do.
23 December 2010
Gingerbread Stars
I knew I wanted to make stars, because they're pretty, and I can make smaller, bite-sized ones easily. I also didn't have much time, so I wanted something I could decorate quickly. I found the most adorable sprinkles at Target: red jimmies with white candy cane shapes, red nonpareils with green holly leaves, and green jimmies with white snowflakes. I also had a nice big jar of "holiday" nonpareils, basically green, red, and white mixed together. And I had some silver, chunky sprinkles leftover from the time I made geode cupcakes!
Gingerbread Cookies
(adapted from this recipe)
- 2.5 tbsp dark corn syrup
- 2.5 tbsp maple syrup
- 2.5 tbsp packed dark brown sugar
- 2.5 tbsp white sugar
- 1 tbsp ground ginger
- 1.5 tsp ground cinnamon
- 1/2 tsp ground allspice
- 1/2 tsp ground cloves
- 1 tsp baking soda
- 1 stick (1/2 cup) unsalted butter, cut into tablespoon pieces
- 1/2 a large egg, lightly beaten
- 2 cups gluten-free all-purpose flour
- 1/4 teaspoon salt
- Bring corn syrup, maple syrup, sugars, and spices to a boil in a 4- to 5-quart heavy saucepan over moderate heat, stirring occasionally, and remove from heat. Stir in baking soda (mixture will foam up), then stir in butter 3 pieces at a time, letting each addition melt before adding next, until all butter is melted. Add egg and stir until combined, then stir in most of the flour (leave about 2 tbsp aside) and salt.
- Preheat oven to 325°F.
- Transfer dough to a lightly floured surface and knead, dusting with as much of remaining 2 tbsp flour as needed to prevent sticking, until soft and easy to handle, 30 seconds to 1 minute.
- Roll out dough about 1/8-inch thick between 2 sheets of wax paper. Place on a flat surface (cutting board or cookie sheet) and refrigerate for about 10-15 minutes. Cut out as many cookies as possible with cutters and carefully transfer onto parchment-lined baking sheets, arranging them about 1 inch apart.
- Bake cookies in upper and lower thirds of oven, switching position of sheets halfway through baking, until edges are slightly darker, 10 to 12 minutes total (watch carefully toward end of baking; cookies can burn easily). Transfer cookies to racks to cool completely. Make more cookies with remaining dough and scraps (reroll once).
- Once cooled, decorate as desired.
Royal Icing
- 3 cups powder sugar, sifted
- 2 large egg whites
- 2 tsp lemon juice
- 1 tsp almond extract
- Mix everything in your Kitchenaid with the paddle attachment on low to low-medium speed until it's smooth and will form soft peaks, about 5 minutes.
- Add colors if necessary. Keep covered with a damp paper towel or plastic wrap when not using.
- Pipe onto cookies as desired.
I packaged them up and brought them to my office, then set them out on display for everyone. They loved them and I only had a couple left over to bring home. Yay!
02 December 2010
Newsletters I Actually Love Getting
Here are some of the best email newsletters out there, according to me:

CRAVE Cupcakes / Sprinkles Cupcakes
Initially, I was subscribed to Sprinkles, but when I kept getting emails showing off their adorable & delicious-looking cupcakes, I began to get frustrated. There was no Sprinkles in Houston! So I subscribed to the CRAVE Cupcakes newsletter for my cupcakes fix. I mean, who doesn't like to look at some goodies every now and then? I may not be able to afford these very often, but I can at least daydream about them.
Moo.com's MOOsLetter
I have a kind of obsession with MOO. At least once a month, I login and design new mini cards, stickers, etc. and usually end up not ordering them (yet). MOO's newsletter is perfect for me because it's a regular (but not too frequent) reminder of how cool they are, without being overly sales-pitch-like. They show off cool things that people are doing with their products, and usually they contain some sort of promo code for discounts. Perfect for inspiration and motivation to design & purchase some of your own products from MOO!

Etsy Finds
Sure, it's a daily newsletter, and sometimes those can get overwhelming, but not these! Etsy Finds is a great email to open when you just want to look at creative, pretty, interesting products. It's another source of inspiration, and occasionally I find something I want to purchase right away! I'll bet 1/3 of my Favorites on Etsy I found from this newsletter.

A Word A Day
Can you really go wrong with something as simple and fun as a word a day email? I like learning (or being reacquainted with) a new word every weekday. They have weekly themes, and each word is done justice. You'll learn its meaning, pronunciation, etymology, and origins, along with a few examples of it in use. Fantastic!

Photojojo
This one's for photography junkies, mostly, but it's a lot of fun for casually creative individuals, too. It's chock full of great gift ideas, photography accessories, and fun photo projects. Another good source for both inspiration AND shopping potential.
So, what do these newsletters have in common?
- They're non-invasive (they're not bombarding you to buy anything)
- They're pretty to look at (except AWAD, I suppose)
- They're inspiring
What are some of your favorite newsletters to receive?
31 October 2010
Sugar Cookies From My Childhood
Ever since I was a little girl, I have been in love with sugar cookies. When I would go to the grocery store with my mom, the bakery would give kids a free cookie. I always chose the sugar cookies, preferably with sprinkles. As I grew older, my love for sugar cookies did not fade, but it became harder to find that perfect, nostalgic sugar cookie. The pre-made cookie doughs, or the cooke dough mixes, you can buy at the grocery store never tasted the same. Every from-scratch recipe I tried was never quite right, and way too many of them involved lemon. Am I the only one that thinks lemon flavor has no place in a pristine sugar cookie?!
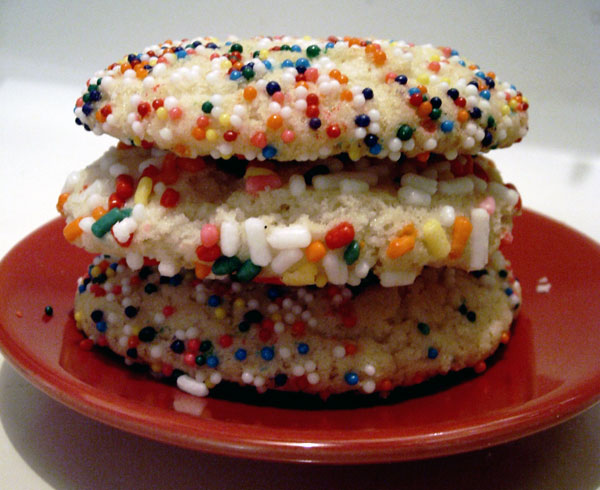
This week, I got a little craving for sugar cookies, and though these days I normally go for my super favorite - decorated shortbread-like sugar cookies (like Gianna's heavenly creations) - this time I wanted the cookies from my youth. I decided to try a little experiment and see if I could better replicate those nostalgia-inducing sugar cookies. I whipped out my snickerdoodle recipe, but instead of rolling the dough in cinnamon and sugar, I rolled it in sprinkles!
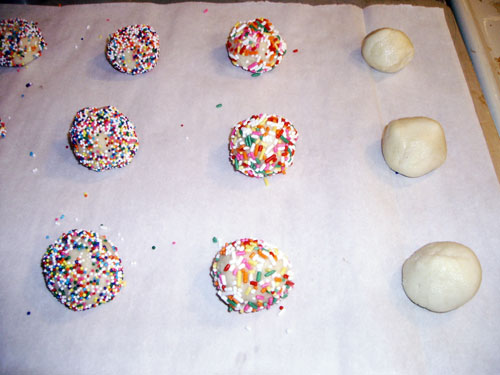
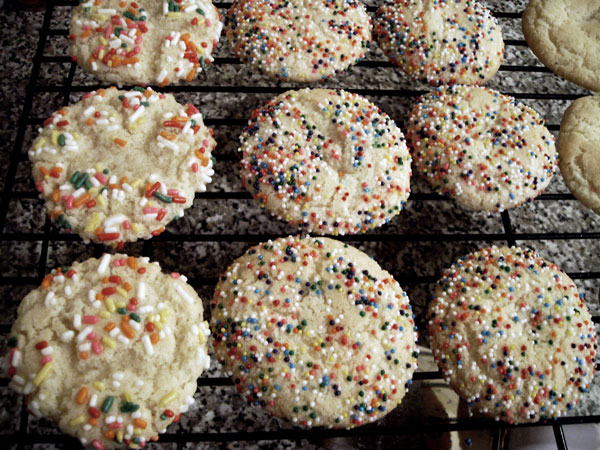
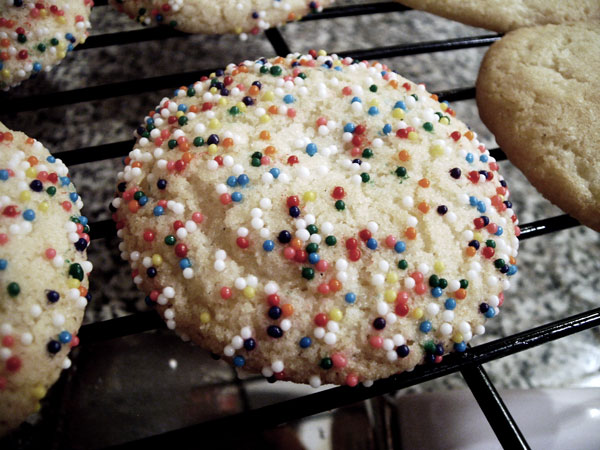
The little balls of sprinkle-covered dough look like donut holes, don't they? So cute. I tried both nonpareils and jimmies, to see which I liked better. Surprisingly, just the difference in sprinkles made a difference in how the cookies baked and tasted. The ones rolled in jimmies turned out much softer, and had a more uneven covering of sprinkles in the end. The ones rolled in nonpareils had a more even coating of sprinkles, and they turned out much sturdier. The ones with nonpareils had the flavor I was searching for, and I was so happy! My boyfriend, however, preferred the ones with jimmies. Go figure!
So what is it about this recipe that hit the spot so well this time? I've always wondered if the cream of tartar in snickerdoodle recipes changes the flavor at all, even though I know it is mostly used to give the cookies a bit of spread and fluff. These also have some shortening in them, which I can definitely taste as different than if I had used all butter. I think the original recipe calls for all shortening, but I prefer half butter and half shortening in mine. Also, surprisingly, I think the nonpareils added a lot of that nostalgic flavor I was looking for. They introduce extra crunch and a hint of sweetness in the corners of my mouth. Perfect.
The recipe makes a lot of dough (about 4 dozen 3-inch-diameter cookies), so I took half of it and rolled it up, so I can unfreeze it to slice and bake later! If you'd like to do the same, I've got a great tip for getting your rolled cookie dough shaped perfectly. I used to always struggle with rolling my cookie dough, because it was uneven and lumpy. Here's how to make it perfectly round, for uniform cookies!
Rolling Cookie Dough into a Log:
- Set out a large sheet of wax paper.
- Arrange your cookie dough in a general log shape, along the middle of the wax paper.
- Wrap the top of the wax paper over the log of dough so it is covered completely.
- Get a straight edge (like a metal ruler) and press it up against the bottom of the log of dough, on top of the wax paper.
- Holding the ruler in place, pull gently on the bottom piece of wax paper ONLY. This will pull the paper taut and in the process it will squeeze the cookie dough into a nice, rounded shape.
- When your dough is the diameter you want, remoe the ruler and finish wrapping up the dough with the wax paper, and twist the ends closed. I like to write the type of dough and date on the outside so I'll remember what it is when I grab it from the freezer later.
Now, if you'd like to make some of your own sugar cookies / snickerdoodles, here's the recipe I used. This is probably one of my most popular cookies around the holidays. Everyone I share them with always comes asking for more, and nobody can tell they're gluten-free!
What you'll need:
- 1/2 cup butter, softened
- 1/2 cup shortening
- 1 1/2 cups sugar
- 2 large eggs
- 2 tsp vanilla extract
- 2 3/4 cup GF all-purpose flour*
- 2 tsp cream of tartar
- 1 tsp baking soda
- 1/4 tsp salt
Preparation:
- Preheat oven to 400° F and line baking sheets with parchment paper.
- Mix the butter and shortening in your kitchenaid with the paddle attachment until smooth and well-blended.
- Add the sugar and mix until well blended.
- Add the eggs one at a time and mix well after each addition.
- Add the vanilla and mix well.
- In a separate bowl, whisk together the dry ingredients.
- Add the flour mixture into the wet mixture. I did this in about 3 additions, so it wasn't a ton of flour all at once. Mix until well blended.
- Roll the dough into balls (about the size of a donut hole) and roll them in your choice of sprinkles, sugar, or cinnamon-sugar mixture (or nothing at all - that tastes great, too!). Place them on baking sheet about 2 inches apart.
- Bake for 8-10 minutes. I find the ones rolled in jimmies take a bit longer to bake, and they still come out softer. 9 minutes seems to be about the magic number for all different variations. If you like your cookies a little crispier, go for 10-11 minutes.
If you intend to roll and freeze this dough for slice-and-bake action later, I suppose you can just set them on the baking sheet and top (and bottom?) them with sprinkles or cinnamon sugar.
*My GF all-purpose flour mixture consists of 1 part brown rice flour, 1 part white rice flour, 1/3 part tapioca starch, 2/3 part potato starch, and 1/2 tsp xanthan gum per cup of flour.
Enjoy~
28 September 2010
Glow Gluten Free Cookies (Review)

Thanks to Kim at Age of Autism I was one of the lucky winners of a whole set of Glow Gluten Free cookies! Both Kim and Jill (from Glow GF) were so sweet to communicate with, and the cookies arrived really quickly. I wish I could have been just as timely as posted this review a lot sooner - I'm sorry it took me so long, ladies!
When I opened the box, I was amazed to find not just one sample of cookies, but four different boxes of cookies inside! My boyfriend and I got to sample the Chocolate Chip, Double Chocolate Chip, Snickerdoodle, and Gingersnap cookies! Yes -- ALL of their flavors. How awesome is that? And aren't the boxes SO cute?! They fit seven cookies inside, wrapped in a second layer of freshness protection.
One thing I love about these cookies is that not only are they gluten free, but they are also preservative free (and also casein and trans fat free!). As a baker, I have a strong love of whole, natural ingredients used in my foods, so I love to see the same care put into the baked goods that I buy. And as I am wont to do with ALL my foods these days, one of the first things I did was read the ingredients panel. I have to hand it to Glow Gluten Free -- you have convinced me that baked goods using bean flour CAN taste good! This is the first experience I have had with bean flours that has been a positive one, so that is saying something!

These cookies were yummy! The gingersnaps were the chewiest of the bunch, and they had that familiar gingerbread flavor and texture. Folks, the chocolate chip? They were reminiscent of Chips Ahoy! in a good way, only these were a bit chewier and had a more robust flavor. I think the chocolate Glow GF uses much be top notch, because I could taste the quality in the chocolate chip cookies. And the double chocolate chip? SO chocolately and really flavorful. I think these might have been my favorite. Snickerdoodles are one of my favorite holiday cookies, and these deliver. They're crispy (which I enjoy) and they leave that amazing, zingy aftertaste that makes my mouth happy even when the cookie is all gone.
All in all, I'd say these are some of the best gluten-free cookies I've tasted so far. If you see these on the shelf at the grocery store - pick them up! Unfortunately, I haven't seen these in my area yet, and if you're having the same trouble, don't fret. Just buy them online!
(You can also find Glow Gluten Free on Facebook and twitter.)
10 September 2010
Strawberry Basil Pound Cake
This week, I was gifted with so many things that I just knew I needed to show them off! First, some lovely girls from the church across the street were walking around our neighborhood handing out bags of fresh basil and oregano from their community garden! Isn't that awesome? It smelled SO good, folks.
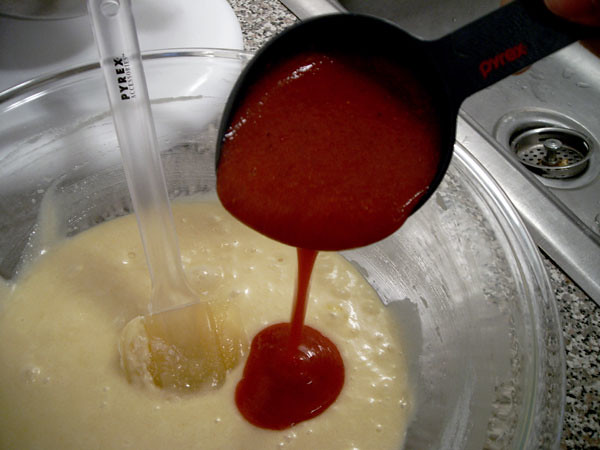
I was also a lucky recipient of some bakeware tools from Pyrex, thanks to Foodbuzz! They sent me some magnetic measuring cups, magnetic measuring spoons, and a large glass mixing bowl. Guys, I can't tell you how happy I am with these items. The cups and spoons are shaped with a little spout on them for easy scooping and pouring, and their magnets make them SO easy to keep together. The mixing bowl is the perfect size for mixing by hand, and my rubber spatula is pretty much in love with its smooth interior. Yay, thank you Pyrex and Foodbuzz!
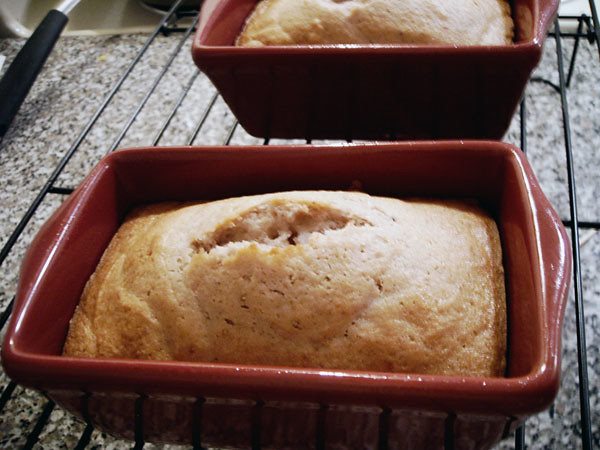
And thanks to the suggestion of a friend, I decided to make a strawberry and basil pound cake with all of my new stuff! Luckily I already had some strawberry puree that I'd been planning to use for something else. And I have just bought the most adorable mini loaf pans at the craft store!
This recipe makes four small (7 oz) pound cakes, or one large pound cake.
Ingredients
- 1 cup sugar
- 5 tbsp butter, melted
- 4 eggs
- 1 cup gluten-free all-purpose flour*
- generous 1/4 tsp baking powder
- pinch salt
- generous 1/3 cup strawberry puree
- 2 fresh basil leaves, finely chopped
*My GF flour mixture consists of 3 parts brown rice flour, 3 parts white rice flour, 2 parts potato starch, 1 part tapioca starch, and 1/2 tsp xanthan gum per cup of flour. The original recipe called for cake flour, which is fine, too, but for a gluten-free recipe, I prefer not to use cake flour most of the time.
Preparation
- Preheat oven to 325° F and spray your loaf pans with cooking spray.
- Combine the flour, baking powder, and salt in a bowl and set aside.
- Stir the butter and sugar until well mixed (feel free to use your kitchenaid for this, but if you don't have one, hand mixing works beautifully).
- Add the eggs, one at a time, mixing well between each addition.
- Add the flour mixture slowly, mixing well until it is cohesive.
- Add the strawberry puree and basil and mix until well combined.
- Pour into pans (for my mini pans it was about 1/2-cup batter per pan - it made 4 cakes).
- Bake for 30-35 minutes, or until a toothpick comes out clean.
Serving and Eating
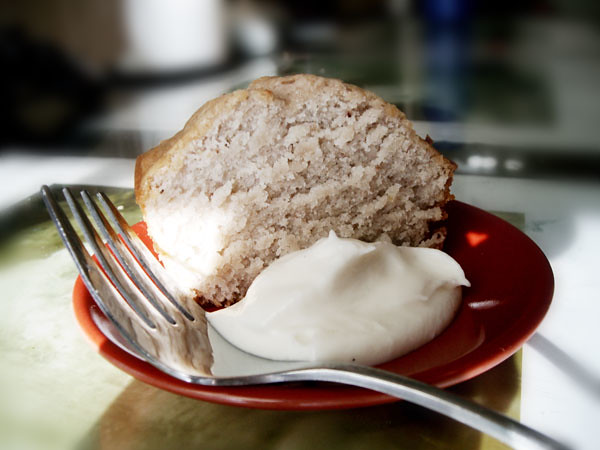
Friends, this cake is so good that my boyfriend can't stop eating it! I suggest that you serve it with some vanilla cream (recipe here), or even a nice strawberry glaze on top. The strawberry flavor in this cake isn't overwhelming, but the entire combination is a sweet, gently spicy, soft cake.
[The photo at the top of this blog has been entered in the Gluten Free Photo Contest!]
05 September 2010
Financiers with Vanilla Cream
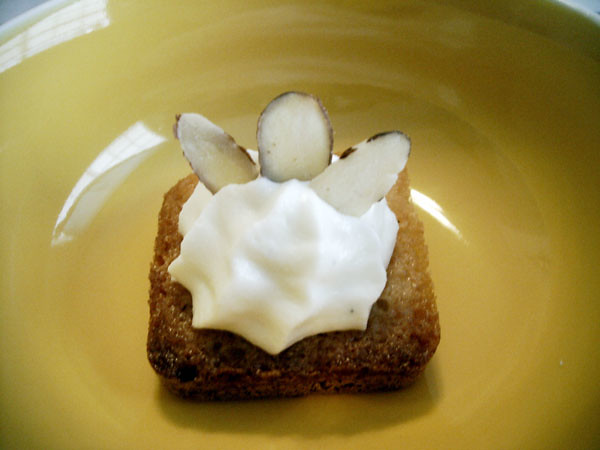
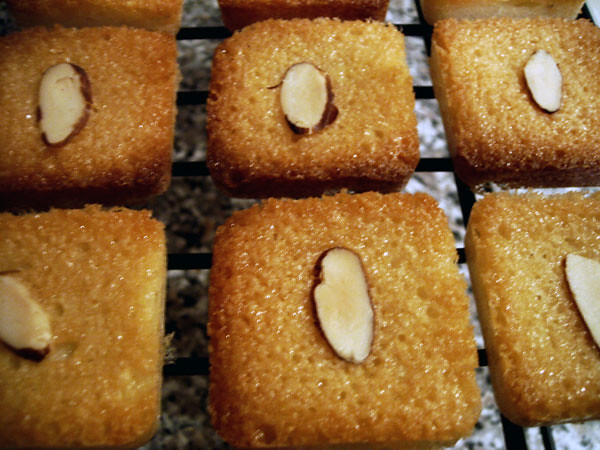
I've figured it's about time I made a gluten-free version, which should be pretty easy since there isn't much gluten in them to begin with. I have a small silicone mold that I bought a while back, and I thought it would be perfect for these financiers. It has square molds, and I thought that would perhaps be pretty, compared to the usual long rectangle shape of financiers.
First time around, I filled the molds almost all the way to the top, and after baking them twice as long as directed, they were still raw in the bottom. I had to throw my entire first batch in the trash. Boo! :( So, I've learned a couple of things while making them, and I've included these tips in the recipes below.
Financiers
Ingredients- 100 grams TPT (50 grams almond flour, 50 grams sugar, mixed well)
- 170 grams powdered sugar, sifted
- 50 grams all-purpose gluten-free flour*, sifted
- 130 grams egg whites (about 4.5 large eggs' worth)
- 175 grams buerre noisette (brown butter)
- Preheat the oven to 375 degrees F.
- Melt the butter on the stove on low heat. Boil until the butter begins to separate, and the solids sink to the bottom and turn brown. Remove quickly from heat and pour through a sieve or cheesecloth into another container to cool. Let cool to at least 40 degrees C (85 degrees F). It is important to keep a close eye on this because it can begin to burn very quickly. Pouring it through a sieve will remove all of the solids that you don't want in your buerre noisette.
- Whisk together all of the dry ingredients until they are well incorporated. Then put the dry mixture in your kitchenaid with the paddle attachment.
- Gently whisk the egg whites a little, and then add them to the dry mixture in the kitchenaid. Turn on low-medium speed and mix well.
- With the mixer on low speed, slowly pour the cooled brown butter into the kitchenaid and allow it to mix until the butter is well incorporated.
- Brush the molds with a little bit of leftover brown butter or spray with cooking spray. If using a silicone mold, place it on a flat baking sheet before filling it. If you do not have silicone molds, you can also use mini tart molds or mini muffin tins.
- Pour into a piping bag with a medium-sized round tip and pipe into the molds. If the molds are deep, like mine, be sure not to pour more than 1/8-inch or so of batter into each mold. When filled, tap the mold against the counter to settle the contents evenly.
- Bake for 4-5 minutes, then remove from oven and place an almond slice (or berry, if you like) on each. Then put it back in the oven for another 4-5 minutes. The baking time will vary depending on how much batter is in your molds, and their material. I believe my mold is a bit thicker than the ones we used at school, so I actually had to bake mine for about 20 minutes total. Just continue watching them, and add a couple of minutes at a time, until they are nicely browned on the top. Then remove them from the oven to cool on a rack.
Here's the part where I ate a couple, because they're just so hard to resist. The powdered sugar in the recipe gives them a distinct crispy, chewy edge that is so familiar In a lot of French baking.
While they're cooling, you can prepare the cream!
Vanilla Whipped Cream Frosting
Ingredients- 2 ounces cream cheese, softened
- 2 tbsp sugar
- 1/2 tsp vanilla extract
- 1/2 cup heavy whipping cream
- To make sure your cream cheese is softened enough, feel free to put it in the kitchenaid with a paddle for a minute or two.
- Switch to the whisk attachment and add the sugar and vanilla. Mix until smooth and creamy. You'll probably need to scrape the sides with a rubber spatula a few times during the process.
- Once it is well mixed, set the mixer to low and slowly pour in the heavy whipping cream.
- Continue whipping (you may want to up the speed a little) until it is well mixed and the cream forms stiff peaks. Again, you'll probably want to scrape the sides a few times during the process.
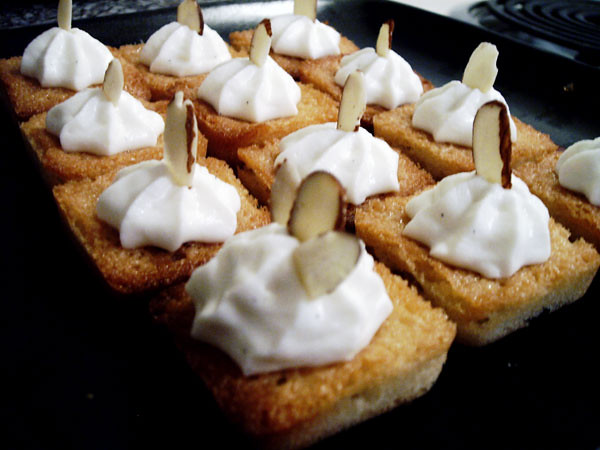
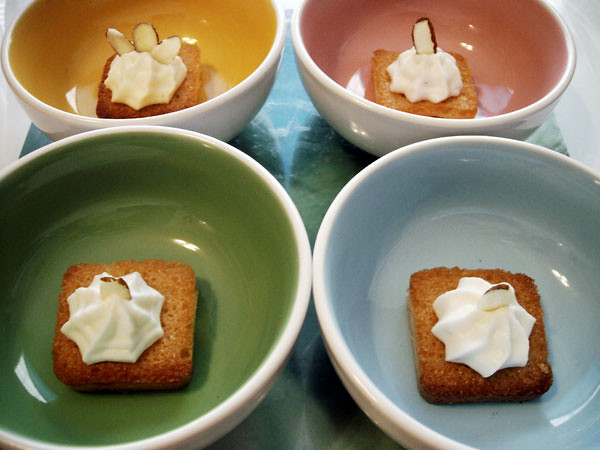
- When ready, prepare in a piping bag with your desired tip. Pipe onto each financier and garnish with an almond slice.
02 September 2010
Why the Vegan Baker Did So Well on Cupcake Wars

Against my initial aversion of most things reality-tv-related, I've gotten myself sucked in to watching Cupcake Wars whenever I happen to catch it on the Food Network. Even my boyfriend is enjoying watching it with me (I think it has something to do with him enjoying hearing me analyze what's going on - much like I enjoy hearing him analyze MMA fights). On a recent episode, the contestants consisted of: a young man, a girl with her sister as an assistant, a middle-aged woman, and a young vegan girl named Chloe. All of them had years of experience in their cupcake businesses, except for the vegan girl who had only been in business for 3.5 months! Of course, I just had to see how things would pan out.
Time and time again, specialty-diet bakers face skepticism when offering their goods to the general public. So naturally, I groaned with frustration, but was not surprised, when the judges announced that they were "worried" upon encountering Chloe's vegan cupcakes for the first time. But by the end of the second round she had completely won them over, and Chef Florian (the hard to please, French judge) had even said he'd become a vegan fan!
What is it that made Chloe and her cupcakes so successful, when others were struggling with some foolish mistakes (as I often see on Cupcake Wars)? Why was it that she excelled under pressure, while the others were flustered? Here are a few things that I think helped her achieve victory, coming from my own experience as a specialty-diet baker.
1. Specialty-diet bakers are accustomed to experimenting.
When I started out as a gluten-free baker, I had a LOT of missteps and ruined cookies. Even with gluten-free cookbooks and blogs so abundant now (they were not quite as easy to find even a few years ago), it takes time and practice to learn how to work with these ingredients and recipes. I have no doubt that it is a similar experience for vegan bakers, sugar-free bakers, etc.We spend a lot of time testing recipes, adding a bit more of this or that, trying a different liquid, realizing the dough is too dry, making sure the batter isn't too runny, and on and on. Now, I understand that "regular" bakers go through similar things, but unless you have delved into any kind of restricted-ingredient baking, you don't know what kind of additional challenges are faced.
Because of all of these experiences, it is my opinion that specialty-diet bakers can become a lot more in-tune with our ingredients, our recipes, and our methods, than some other bakers out there. For example, I was somewhat appalled as one of Chloe's competitors added too much Grand Marnier to her batter and it was so watery that she had to try to fix it by adding a bunch of sugar. Are people not taught baker percentage anymore? Perhaps it was just the time constraints that led the woman to make this mistake, but I didn't see any others having that problem.
2. Specialty-diet bakers know what works and what doesn't.
Due to years of experimenting, I've gotten a pretty good feel for what will work in my recipes. I know that adding coffee to my chocolate cookie dough gives it a very different texture when baked. I know that refrigerating my peanut butter cookie dough before shaping and baking leads to a smaller, more compact cookie than if the dough is at room temperature. I know that hand mixing certain things is the only way to go, and using my kitchenaid is necessary for others. I know that attempting a traditional shortbread cookie recipe will result in cookies so dry and fragile that they will fall apart if you even look at the wrong.It is because of all the extra time we spend perfecting our recipes, that specialty-diet bakers know how many things can go wrong. In a competitive setting, it is best to go with things you know will work, things you've tried and are comfortable with, things that you know will not fail you, things that you know you will have enough time to complete. One thing I've noticed a lot of in Cupcake Wars is that people sometimes forget they're not superhumans. They want to create elaborate fondant decorations for cupcakes, forgetting that they'll have to spend a significant portion of time making one thousand of them for the final round. Know your limits!
3. Specialty-diet bakers often use high-quality, whole ingredients in their baking.
One of Chloe's competitors kept throwing bitter criticism at her, saying that vegan baking included "fake stuff" for ingredients. I'll admit that I don't know much about vegan baking, but I do know a little. I also realize that I do not know the ingredients in Chloe's recipes, so perhaps I am incorrect in surmising that she does not use a bunch of "fake" ingredients. All I know is that those of us with restrictive diets, are very conscious of what we put into our bodies. We, more than anyone, are concerned about the amount of chemicals and other questionable ingredients listed on nutritional information panels.To assume that vegans are using "fake" ingredients is to display your ignorance of their methods. Did you know that flaxseed can be a great substitute for eggs? Did you know that vegetable oils, fruit juices, applesauce, and other things can be used in place of butter and milk? When the only thing you have to criticize about your competition is their alleged "fake" ingredients, and not their time management, presentation, or technique (by the way, did you notice that Chloe and her assistant were mixing all their batters by hand? Adorable!), it just goes to show how much they intimidate you.
And if one gauges the rest of her recipes based on her Chocolate Strawberry Shortcake recipe that she shared on the Food Network, I think it's safe to say she's not using anything "fake".

4. Specialty-diet bakers know that they must create exceptional goods, or nobody will eat them unless there is no other choice.
You know, it's an unfortunate thing, but I think that people are justified is approaching specialty-diet foods with caution. When I first went on a gluten-free diet, I spent months searching for a GF food that didn't taste like sand or cardboard. The first tasty gluten-free food I had was made by my own hands. It's what inspired me to pursue gluten-free baking on a larger scale, and to share these goods with others. Why should Celiacs have to resort to boring, dry cookies when we want something sweet? Why should we pine away at those gorgeous, delicious-looking cookies at Whole Foods, and then solemnly nibble on our gluten-free "treats"?I'll admit that over the years, some truly awesome gluten-free products have become available in stores. Glutino
In Conclusion
I must have started writing this blog entry about 8 different times, and each time it seemed too lengthy and not explanatory enough. Though this did turn out rather long-winded, I think I finally got the points across that I was aiming to convey. I hate to use idioms, but I have to suggest that you "don't knock it till you've tried it" when it comes to specialty-diet foods. Keep in mind that the person who made it knows a lot more about it than you do, and be prepared for the idea that you may just like it better than the "normal" version. ;)29 August 2010
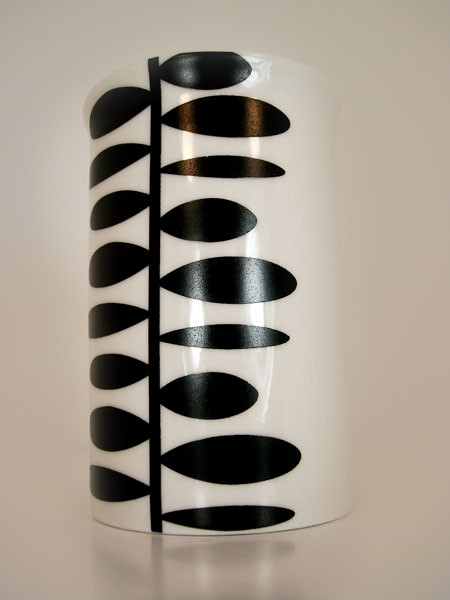
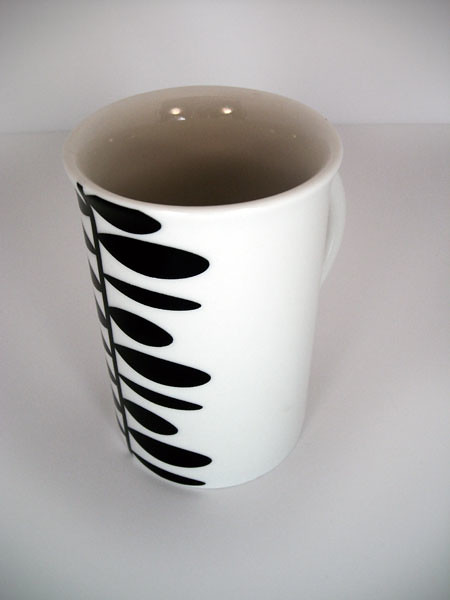
Another Pretty Cup
25 August 2010
What's Up With Wooden Spoons?
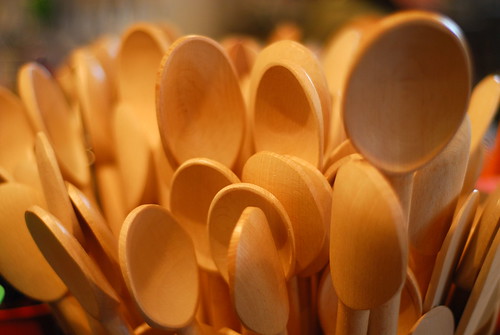
Whenever I read a recipe in which the instructions specify that I stir something with a wooden spoon, my mind instantly goes back to when I was a little girl, helping my mom cook and bake in the kitchen. (Of course, this also reminds me of how she would threaten to spank us with that wooden spoon if we were being little jerks, but that's another story for another day.) I can still see her wooden spoons clearly in my mind's eye. That golden color, the edges browned from heat, the way the wood cracked and split and food sunk in and stained the spoon, the hint of scents from previously-stirred foods...
To be quite honest with you, friends, I am rather grossed out by the idea of using a wooden spoon at all. In my adult life, I have not even considered buying or using a wooden spoon. I honestly don't see the point. They seem like germ-attractors, and the way they scrape against pots and things kind of makes my skin crawl (like nails on a chalkboard). I even read a story on a gluten-free blog once, where the writer got "glutened" by some soup her friend made for her. The friend took extra care to make everything gluten-free, but that sneaky, sticky protein snuck into the soup by means of the wooden spoon she used to stir the soup - the same spoon she used for her regular cooking.
Aren't there better things one can use instead of a wooden spoon? I've gotten by just fine without these utensils, so I'm wondering why anyone likes to use them. All this ruminating has led me to research the benefits and drawbacks of using wooden spoons, along with alternatives.
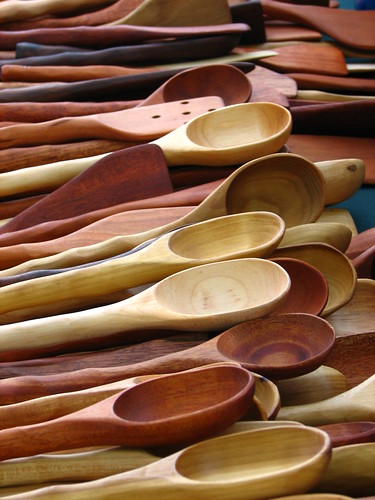
What Are Wooden Spoons Good For?
1. Wooden spoons do not transfer heat as much as metal spoons do.This could be important in keeping heat consistent throughout a dish you are preparing and not adding body heat transferred from your hand through the spoon, but in my opinion this has limited applications (although I am no expert).
2. Wooden spoons do not scratch the bottom of a pan like a metal utensil would.
According to Wikipedia, "this is useful when making dishes such as scrambled eggs." Okay, folks, if you are using a spoon -- wooden OR metal -- to make scrambled eggs, I have to ask you WHY? Why use a spoon to do something that would be much easier with a spatula? Plastic doesn't scratch the bottom of a pan either! And if you want to scrape the sides and bottom of a pan, silicone spatulas work WONDERS and don't scratch anything.
3. Wood will not react with some ingredients the way some metals will.
This is mostly applicable when making things like Amish breads, which have ingredients that react with aluminum. This means that if you use a stainless steel bowl or spoon with your Amish bread, you are still safe (and don't have to use a wooden spoon). Some metals (aside from stainless steel) will also leave a metallic taste in foods, which is unpleasant and unnecessary!
4. Wooden spoons will not crystallize sugar prematurely when making candy.
This article at The Kitchn compares using a metal spoon versus a wooden spoon for making candy and cooking sugar. The writer notes that her culinary instructor insisted on using only metal spoons because wooden spoons carry bacteria. However, the writer then refers to a book called On Food and Cooking, which argues that a metal spoon can cause unwanted crystallization due to the heat transfer effects of the material, so recommends using a wooden spoon instead. To both of these arguments, I point out that my chef instructor never had us use spoons for anything besides tasting (and scooping ice cream), and we cooked all of our sugar without using utensils because ANY stirring can cause crystallization, no matter what tool you use to do it.
5. Wooden spoon handles have a nice cylindrical shape.
This can be good for use in shaping pastillage or gum paste. Aside from that, I don't see much benefit, unless you just prefer this shape for gripping.
6. There may or may not be more uses for wooden spoons.
You can learn about them at Uncyclopedia.
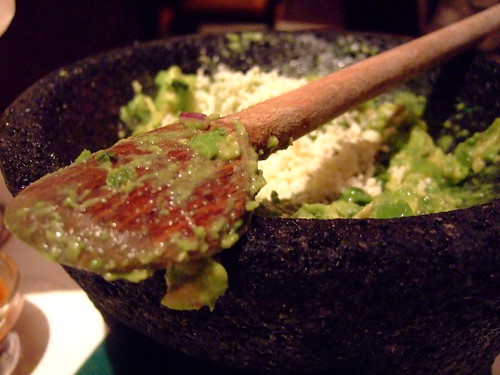
Why I Don't Recommend Wooden Spoons
1. Wooden spoons are high maintenance.Before you can even use your new wooden spoon, you'll have to prepare it. This means finding some mineral oil, warming it, rubbing it onto the spoon with a cloth, waiting a couple hours, then wiping off any excess oil. Oh, and you'll have to do this several times if you want it to be sufficient. And you'll also have to repeat this process throughout the lifetime of the spoon.
2. Wooden spoons are harder to keep clean.
Washing wooden spoons requires extra care, because you must be careful not to have the water too hot (heat damage), you mustn't let it soak in the water (water damage), and you'll need to dry them off right away to help discourage bacteria from sticking around.
3. Wooden spoons can harbor and transfer bacteria.
That's right, you'll need to take special care with your wooden spoon to ensure that it isn't harboring any nasty germs in it. See the cleaning methods above, but also take note that any scratches, cuts, or cracks in your wooden spoon are just inviting bacteria to come and get comfortable. Using the same spoon for things like raw meat and then for vegetables (or any other food item) is another way to incite cross-contamination and bacteria growth.
4. Wooden spoons are good for stirring, but not much else.
Seriously, take a look at the shape of your wooden spoon. The bowl can barely even be called a bowl; it is shallow and narrow, thus it is almost useless for doing any kind of scooping. The edges are thick and angular, which leaves out any kind of scraping you may want to do as well. Sure, it might be handy for stirring your soup, but so are many other things that also serve other purposes beyond "stirring soup."
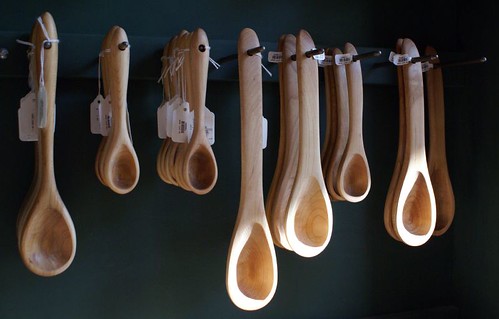
Awesome Alternatives to Wooden Spoons
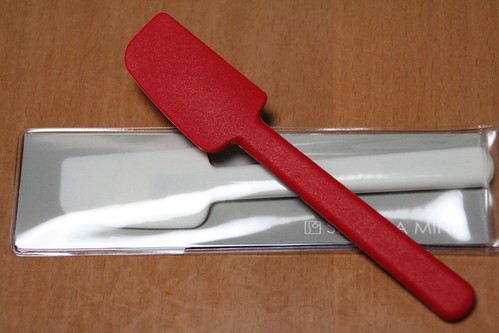
1. Silicone Spatula
A silicone spatula is versatile and doesn't have the many flaws of a wooden spoon. The material is flexible yet sturdy, and is much like rubber. This makes it an ideal utensil for scraping the sides of a bowl, and it will not scratch and of your pots and pans! It is also the best tool for folding ingredients together, like adding your whipped egg whites into a cake batter. Silicone is also heat resistant, which means there is no chance of heat transference. Because of its nonstick surface, it will not retain any smells or flavors from food, either!
Since they come in so many different shapes and sizes, you can have some for baking, and some for cooking that are easier to flip things like pancakes, etc.
NOTE: There are a lot of different silicone and rubber spatulas out there. I recommend one with a longer handle (14") and a nook in one side (this makes scraping off the edge of the bowl SO much easier), like this one here that is similar to the one I own. Unfortunately, I can't find ANY like it for sale online -- what the heck?!
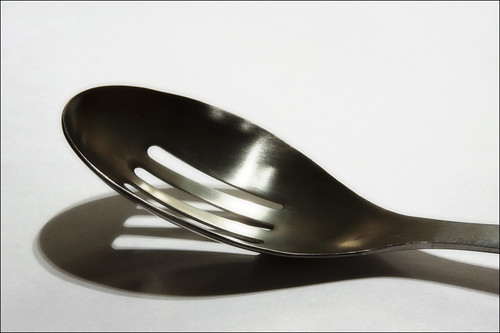
2. Large Slotted Spoon
When I'm cooking, I generally switch over to a large slotted spoon instead of a spatula. Why do I like slotted spoons? For one, they are larger than a wooden spoon, which means more surface area with which to stir my soup, scoop up my potatoes, and mix my fried rice. The slots also allow steam to escape and juices to drip out a little bit, so if I hold the spoon up to my nose, it won't be so hot.


