Showing posts with label recipes. Show all posts

23 December 2010

Gingerbread Stars

We had a little holiday luncheon at my office last week, so I figured that would be a good time to bring some cookies! I'd been wanting to make gingerbread cookies all month, and here was a perfect opportunity.


I knew I wanted to make stars, because they're pretty, and I can make smaller, bite-sized ones easily. I also didn't have much time, so I wanted something I could decorate quickly. I found the most adorable sprinkles at Target: red jimmies with white candy cane shapes, red nonpareils with green holly leaves, and green jimmies with white snowflakes. I also had a nice big jar of "holiday" nonpareils, basically green, red, and white mixed together. And I had some silver, chunky sprinkles leftover from the time I made geode cupcakes!


Gingerbread Cookies
(adapted from this recipe)

  • 2.5 tbsp dark corn syrup
  • 2.5 tbsp maple syrup
  • 2.5 tbsp packed dark brown sugar
  • 2.5 tbsp white sugar
  • 1 tbsp ground ginger
  • 1.5 tsp ground cinnamon
  • 1/2 tsp ground allspice
  • 1/2 tsp ground cloves
  • 1 tsp baking soda
  • 1 stick (1/2 cup) unsalted butter, cut into tablespoon pieces
  • 1/2 a large egg, lightly beaten
  • 2 cups gluten-free all-purpose flour
  • 1/4 teaspoon salt
  1. Bring corn syrup, maple syrup, sugars, and spices to a boil in a 4- to 5-quart heavy saucepan over moderate heat, stirring occasionally, and remove from heat. Stir in baking soda (mixture will foam up), then stir in butter 3 pieces at a time, letting each addition melt before adding next, until all butter is melted. Add egg and stir until combined, then stir in most of the flour (leave about 2 tbsp aside) and salt.
  2. Preheat oven to 325°F.
  3. Transfer dough to a lightly floured surface and knead, dusting with as much of remaining 2 tbsp flour as needed to prevent sticking, until soft and easy to handle, 30 seconds to 1 minute.
  4. Roll out dough about 1/8-inch thick between 2 sheets of wax paper. Place on a flat surface (cutting board or cookie sheet) and refrigerate for about 10-15 minutes. Cut out as many cookies as possible with cutters and carefully transfer onto parchment-lined baking sheets, arranging them about 1 inch apart.
  5. Bake cookies in upper and lower thirds of oven, switching position of sheets halfway through baking, until edges are slightly darker, 10 to 12 minutes total (watch carefully toward end of baking; cookies can burn easily). Transfer cookies to racks to cool completely. Make more cookies with remaining dough and scraps (reroll once).
  6. Once cooled, decorate as desired.


Royal Icing

  • 3 cups powder sugar, sifted
  • 2 large egg whites
  • 2 tsp lemon juice 
  • 1 tsp almond extract
  1. Mix everything in your Kitchenaid with the paddle attachment on low to low-medium speed until it's smooth and will form soft peaks, about 5 minutes.
  2. Add colors if necessary. Keep covered with a damp paper towel or plastic wrap when not using.
  3. Pipe onto cookies as desired.

 I packaged them up and brought them to my office, then set them out on display for everyone. They loved them and I only had a couple left over to bring home. Yay!

31 October 2010

Sugar Cookies From My Childhood


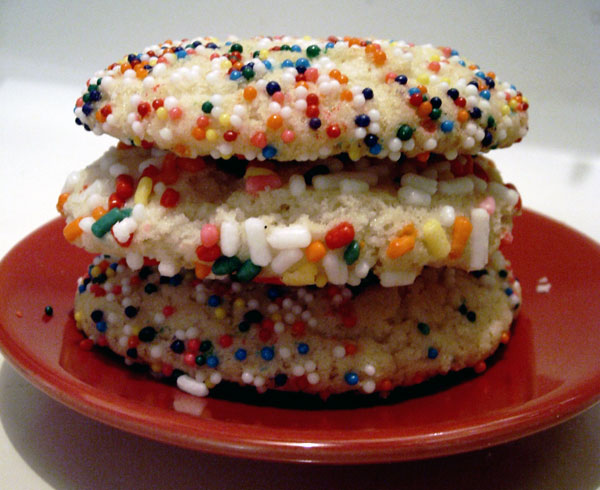
Ever since I was a little girl, I have been in love with sugar cookies. When I would go to the grocery store with my mom, the bakery would give kids a free cookie. I always chose the sugar cookies, preferably with sprinkles. As I grew older, my love for sugar cookies did not fade, but it became harder to find that perfect, nostalgic sugar cookie. The pre-made cookie doughs, or the cooke dough mixes, you can buy at the grocery store never tasted the same. Every from-scratch recipe I tried was never quite right, and way too many of them involved lemon. Am I the only one that thinks lemon flavor has no place in a pristine sugar cookie?!

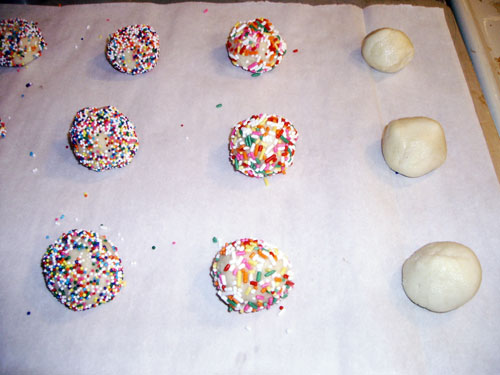
This week, I got a little craving for sugar cookies, and though these days I normally go for my super favorite - decorated shortbread-like sugar cookies (like Gianna's heavenly creations) - this time I wanted the cookies from my youth. I decided to try a little experiment and see if I could better replicate those nostalgia-inducing sugar cookies. I whipped out my snickerdoodle recipe, but instead of rolling the dough in cinnamon and sugar, I rolled it in sprinkles!


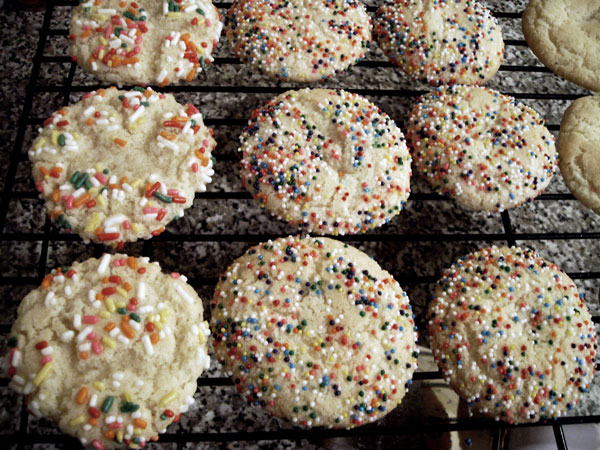
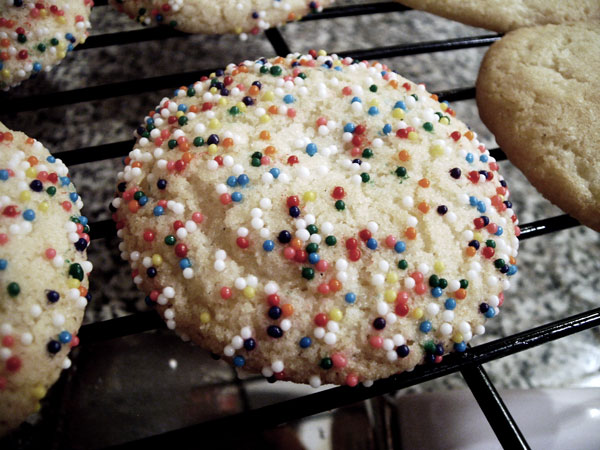
The little balls of sprinkle-covered dough look like donut holes, don't they? So cute. I tried both nonpareils and jimmies, to see which I liked better. Surprisingly, just the difference in sprinkles made a difference in how the cookies baked and tasted. The ones rolled in jimmies turned out much softer, and had a more uneven covering of sprinkles in the end. The ones rolled in nonpareils had a more even coating of sprinkles, and they turned out much sturdier. The ones with nonpareils had the flavor I was searching for, and I was so happy! My boyfriend, however, preferred the ones with jimmies. Go figure!

So what is it about this recipe that hit the spot so well this time? I've always wondered if the cream of tartar in snickerdoodle recipes changes the flavor at all, even though I know it is mostly used to give the cookies a bit of spread and fluff. These also have some shortening in them, which I can definitely taste as different than if I had used all butter. I think the original recipe calls for all shortening, but I prefer half butter and half shortening in mine. Also, surprisingly, I think the nonpareils added a lot of that nostalgic flavor I was looking for. They introduce extra crunch and a hint of sweetness in the corners of my mouth. Perfect.


The recipe makes a lot of dough (about 4 dozen 3-inch-diameter cookies), so I took half of it and rolled it up, so I can unfreeze it to slice and bake later! If you'd like to do the same, I've got a great tip for getting your rolled cookie dough shaped perfectly. I used to always struggle with rolling my cookie dough, because it was uneven and lumpy. Here's how to make it perfectly round, for uniform cookies!

Rolling Cookie Dough into a Log:
  1. Set out a large sheet of wax paper.
  2. Arrange your cookie dough in a general log shape, along the middle of the wax paper.
  3. Wrap the top of the wax paper over the log of dough so it is covered completely.
  4. Get a straight edge (like a metal ruler) and press it up against the bottom of the log of dough, on top of the wax paper.
  5. Holding the ruler in place, pull gently on the bottom piece of wax paper ONLY. This will pull the paper taut and in the process it will squeeze the cookie dough into a nice, rounded shape.
  6. When your dough is the diameter you want, remoe the ruler and finish wrapping up the dough with the wax paper, and twist the ends closed. I like to write the type of dough and date on the outside so I'll remember what it is when I grab it from the freezer later.

Now, if you'd like to make some of your own sugar cookies / snickerdoodles, here's the recipe I used. This is probably one of my most popular cookies around the holidays. Everyone I share them with always comes asking for more, and nobody can tell they're gluten-free!

Drop or Slice-and-Bake Sugar Cookies / Snickerdoodles

What you'll need:
  • 1/2 cup butter, softened
  • 1/2 cup shortening
  • 1 1/2 cups sugar
  • 2 large eggs
  • 2 tsp vanilla extract
  • 2 3/4 cup GF all-purpose flour*
  • 2 tsp cream of tartar
  • 1 tsp baking soda
  • 1/4 tsp salt

Preparation:
  1. Preheat oven to 400° F and line baking sheets with parchment paper.
  2. Mix the butter and shortening in your kitchenaid with the paddle attachment until smooth and well-blended.
  3. Add the sugar and mix until well blended.
  4. Add the eggs one at a time and mix well after each addition.
  5. Add the vanilla and mix well.
  6. In a separate bowl, whisk together the dry ingredients.
  7. Add the flour mixture into the wet mixture. I did this in about 3 additions, so it wasn't a ton of flour all at once. Mix until well blended.
  8. Roll the dough into balls (about the size of a donut hole) and roll them in your choice of sprinkles, sugar, or cinnamon-sugar mixture (or nothing at all - that tastes great, too!). Place them on baking sheet about 2 inches apart.
  9. Bake for 8-10 minutes. I find the ones rolled in jimmies take a bit longer to bake, and they still come out softer. 9 minutes seems to be about the magic number for all different variations. If you like your cookies a little crispier, go for 10-11 minutes.


If you intend to roll and freeze this dough for slice-and-bake action later, I suppose you can just set them on the baking sheet and top (and bottom?) them with sprinkles or cinnamon sugar.

*My GF all-purpose flour mixture consists of 1 part brown rice flour, 1 part white rice flour, 1/3 part tapioca starch, 2/3 part potato starch, and 1/2 tsp xanthan gum per cup of flour.

Enjoy~

05 September 2010

Financiers with Vanilla Cream

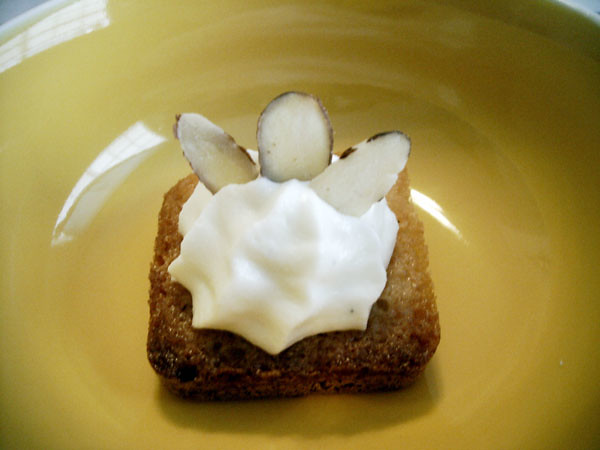
gluten-free financier with vanilla cream

When I was in pastry school, I became entranced with the financiers we made there. Never before had I tasted anything made with buerre noisette, and I had fallen in love. Their crispy outsides. Their soft, almondy center. If I wasn't careful, I'd find myself eating way too many of them when they were set out in the student cafe.

I've figured it's about time I made a gluten-free version, which should be pretty easy since there isn't much gluten in them to begin with. I have a small silicone mold that I bought a while back, and I thought it would be perfect for these financiers. It has square molds, and I thought that would perhaps be pretty, compared to the usual long rectangle shape of financiers.

First time around, I filled the molds almost all the way to the top, and after baking them twice as long as directed, they were still raw in the bottom. I had to throw my entire first batch in the trash. Boo! :( So, I've learned a couple of things while making them, and I've included these tips in the recipes below.

gluten-free financiers


Financiers

Ingredients
  • 100 grams TPT (50 grams almond flour, 50 grams sugar, mixed well)
  • 170 grams powdered sugar, sifted
  • 50 grams all-purpose gluten-free flour*, sifted
  • 130 grams egg whites (about 4.5 large eggs' worth)
  • 175 grams buerre noisette (brown butter)
Preparation
  1. Preheat the oven to 375 degrees F.
  2. Melt the butter on the stove on low heat. Boil until the butter begins to separate, and the solids sink to the bottom and turn brown. Remove quickly from heat and pour through a sieve or cheesecloth into another container to cool. Let cool to at least 40 degrees C (85 degrees F). It is important to keep a close eye on this because it can begin to burn very quickly. Pouring it through a sieve will remove all of the solids that you don't want in your buerre noisette.
  3. Whisk together all of the dry ingredients until they are well incorporated. Then put the dry mixture in your kitchenaid with the paddle attachment.
  4. Gently whisk the egg whites a little, and then add them to the dry mixture in the kitchenaid. Turn on low-medium speed and mix well.
  5. With the mixer on low speed, slowly pour the cooled brown butter into the kitchenaid and allow it to mix until the butter is well incorporated.
  6. Brush the molds with a little bit of leftover brown butter or spray with cooking spray. If using a silicone mold, place it on a flat baking sheet before filling it. If you do not have silicone molds, you can also use mini tart molds or mini muffin tins.
  7. Pour into a piping bag with a medium-sized round tip and pipe into the molds. If the molds are deep, like mine, be sure not to pour more than 1/8-inch or so of batter into each mold. When filled, tap the mold against the counter to settle the contents evenly.
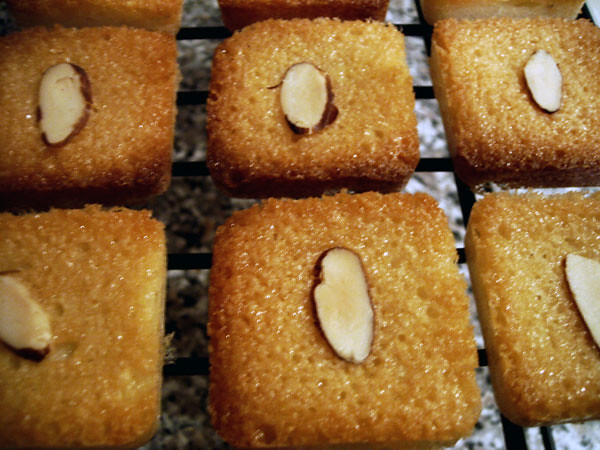
  8. Bake for 4-5 minutes, then remove from oven and place an almond slice (or berry, if you like) on each. Then put it back in the oven for another 4-5 minutes. The baking time will vary depending on how much batter is in your molds, and their material. I believe my mold is a bit thicker than the ones we used at school, so I actually had to bake mine for about 20 minutes total. Just continue watching them, and add a couple of minutes at a time, until they are nicely browned on the top. Then remove them from the oven to cool on a rack.
*My all-purpose flour mixture consists of 3 parts brown rice flour, 3 parts white rice flour, 2 parts potato starch, 1 part tapioca starch, and 1/2 tsp of xanthan gum per cup of flour.

Here's the part where I ate a couple, because they're just so hard to resist. The powdered sugar in the recipe gives them a distinct crispy, chewy edge that is so familiar In a lot of French baking.

While they're cooling, you can prepare the cream!

gluten-free financiers with vanilla cream


Vanilla Whipped Cream Frosting

Ingredients
  • 2 ounces cream cheese, softened
  • 2 tbsp sugar
  • 1/2 tsp vanilla extract
  • 1/2 cup heavy whipping cream
Preparation
  1. To make sure your cream cheese is softened enough, feel free to put it in the kitchenaid with a paddle for a minute or two.
  2. Switch to the whisk attachment and add the sugar and vanilla. Mix until smooth and creamy. You'll probably need to scrape the sides with a rubber spatula a few times during the process.
  3. Once it is well mixed, set the mixer to low and slowly pour in the heavy whipping cream.
  4. Continue whipping (you may want to up the speed a little) until it is well mixed and the cream forms stiff peaks. Again, you'll probably want to scrape the sides a few times during the process.
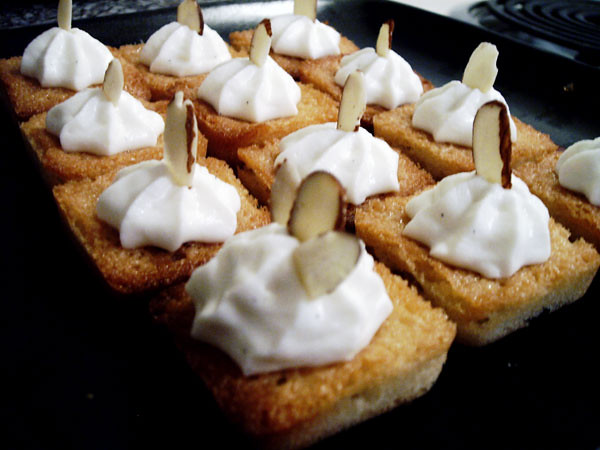
  5. When ready, prepare in a piping bag with your desired tip. Pipe onto each financier and garnish with an almond slice.
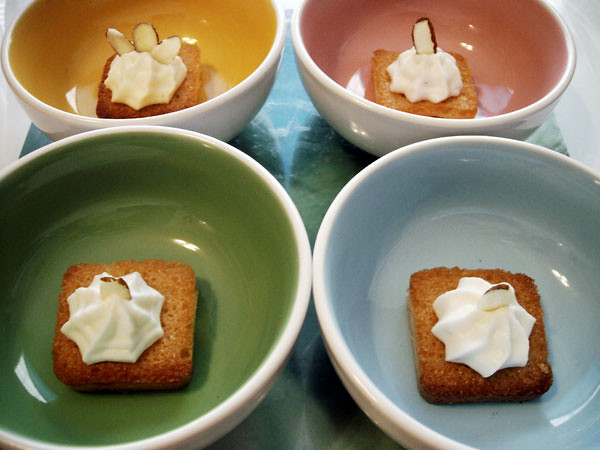
Here's the part where I rushed to take photos of them so I could hurry up and eat them! The soft, smooth texture of the cream really sets off the chewiness of the financiers, and the flavors complement each other in such a delicious way. Enjoy!

gluten-free financiers with vanilla cream

18 July 2010

WoW Cooking Hour: Tasty Cupcake

Sometimes you just want a delicious pastry, you know? It was on this rainy Sunday afternoon that I decided I was in the mood for a cupcake. A tasty cupcake. Well, isn't it lucky, then, that WoW has a recipe with that exact name?!


And look! The cupcake makes you happy! Such fantastic luck that I sh--

WTF is this? Ingredients: simple flour and an egg? Flour. Simple flour. And an egg. That's it? And this is going to make a tasty cupcake that will make me happy?

I have to admit that after my last WoW baking adventure, I was slightly optimistic, yet also a bit leery about these in-game recipes. Certainly there was some magic involved in turning two gooey spider legs into a delicious pie! But folks, I just couldn't bring myself to believe that any kind of Blizzard magic would turn simple flour and an egg into anything tastier than the most boring "bread" anyone's ever tasted.

Because I always give the benefit of the doubt, I decided I'd at least try this "recipe".

Mise En Place


Well, there's not much to it, is there? Simple flour and an egg.

(I actually added a little water to make it a somewhat decent consistency, but don't tell anyone.)


What do you know? It made enough for TWO cupcakes! Maybe this will turn out all right after all...

The Finished Product


I don't know about you, but I don't think this looks much different than it did before I put it in the oven. (In case you're wondering, it was hard as a rock, and I couldn't even bring myself to taste it.) Well, let's see what the final product looks like in-game.


Okay, this looks nothing like that. And on top of that, it's supposed to yield FIVE cupcakes, not two! What a rip-off! I found this whole thing rather unacceptable, friends. So unacceptable, in fact, that I decided to let Blizzard know about it.


Ahhh.... After letting off some steam (even though my message got cut short, god damnit), I decided to make myself a cupcake that was actually tasty.

A Real Tasty Cupcake

And since I'd been looking at, and expecting, a cupcake that looks like the one in the picture, I decided to make mine look like that. Once again, it's a chocolate-looking cake and a berry-looking topping. Well, I deviated a slight bit; hope you don't mind.

Rich Brownie Cupcake with a Red Buttercream Rosette

A REAL Tasty Cupcake
A REAL Tasty Cupcake (excuse the poor image quality; my camera's battery died so I had to take this photo with my phone.)
I used this Best Cocoa Brownies recipe, using my own gluten-free flour mixture as usual, and baked it in mini muffin tins instead of in a brownie pan. I made a pretty typical American buttercream, colored it red, and piped little rosettes on the top.


These are so effing delicious, it's a good thing I made them in miniature size so I can ration them out!

I also made some with a fresh banana buttercream glaze (which doesn't look that pretty, sorry), which you can see here.

22 May 2010

World of Warcraft's Gooey Spider Cake

People often like to draw correlations between WoW and real life, and I'll have to admit that I am no exception. While a lot of gamers like to compare video games to things like war, strategy, and real-life interactions with other people, I prefer to take a slightly more sociopathic route. Being a reclusive pastry chef, I like to stay in my kitchen and bake~!

My newest endeavor is taking recipes from World of Warcraft and attempting to recreate them in my own kitchen. If you missed my first experiment, go see how my [Delicious Chocolate Cake] turned out. This time around I'll be doing another cake, but with more sinister ingredients: the [Gooey Spider Cake].

Recipe Assessment

Gooey  Spider Cake - recipe

Gooey  Spider Cake

Things to note about this recipe:
- It only has one ingredient: gooey spider legs
- Its result looks more like a pie than a cake

Mise en Place

With only one ingredient, this should have been pretty easy to prep. I'll tell you what, folks. I must have killed two dozen spiders (which takes a while for a holy paladin who doesn't do much damage) before I got enough [Gooey Spider Leg] drops to complete this recipe. Luckily, the last one I killed yielded exactly two [Gooey Spider Leg]s.

Gooey Spider Cake - gathering ingredients

You'd think that it'd be easy enough to get what I needed after only one spider, since they have eight legs and everything. I guess sometimes they're just not gooey enough. Or something.

On to the Baking

That wasn't so bad! And now, just to bake the cake.

Gooey Spider Cake - into the oven

I have to admit, I was a bit skeptical of this recipe, having only one ingredient, but I figured Blizzard wouldn't let me down so I decided to forge on with the baking.

Final Result

Gooey Spider Cake - out of the oven

Tada! Wow, that was way easier than I thought it would be. This WoW baking is pretty cool!

Gooey Spider Cake - sliced Gooey Spider Cake - slice

(If you'd like to learn about an alternate way to make this pie, er I mean, cake... check out this blog.)

14 March 2010

World of Warcraft's Delicious Chocolate Cake

Premises and Promises

In order to bridge the gap between World of Warcraft and my kitchen, I've decided to embark on a new endeavor to make WoW food in real life. That is to say that I will be taking in-game recipes and attempting to recreate them in my own kitchen.

There will, of course, be a certain amount of improvisation on my part, in order to make some of these (unrealistic) recipes work; however, I do intend to stick as closely to the game recipes as possible. As time goes on, I also intend to branch out into recipes from other video games, but in the beginning it will be purely WoW items. If there's one you'd like to suggest, please send me a PM.

Blizzard's Delicious Chocolate Cake

Delicious Chocolate Cake

I figured that a good place to start would be with a popular item from Burning Crusade days - the Delicious Chocolate Cake. (Since I am a pastry chef, I intend to stick to the baked goods, but we'll see where things go in the future.)

Recipe Assessment

Delicious Chocolate Cake - recipe
Things to note about this recipe:
  • Simple Flour, not cake flour - this means the cake will be light and fluffy.
  • Ice Cold Milk - this means the cake will be rich, especially in ratio to the flour
  • Mild Spices - perhaps this could be the chocolate? I'm not sure what to use for this.
  • Small Egg - high ratio of eggs-to-flour. This cake will be rich and thick after all.
  • Flask of Port - quite a large amount of alcohol, although this could be tasty.
  • Mageroyal - this could be lumped into the spices, or add an accent to the chocolate.
  • There is no chocolate listed in the ingredients. Interesting.
  • There is no sugar listed in the ingredients. Also interesting.
  • There are berries in the picture (below) but not in the recipe. Heh.

Image Assessment

The first thing that I noticed is the icon doesn't look anything like a chocolate cake. It looks like white cake with some sort of berry filling and green goo on top. I could decorate it to look like that, but let's see what the item looks like in-game.

Delicious Chocolate Cake - whole Delicious Chocolate Cake - slice

So in-game, the actual item looks (or is presumed to look) more like a chocolate cake with some berries on top. I'll shoot for this model because it seems more fitting for the name anyhow.

Kelley's Delicious Chocolate Cake

Now that I'd seen what the original recipe and cake look like, it was time for me to recreate this in my own kitchen. I decided to do this in the style used by Mythbusters. I'd make one cake using the exact recipe from the game (substituting spices/mageroyal as I see fit). Then I'd make another cake using the recipe but expanding it to make it an actual delicious chocolate cake.

Translated WoW Recipe

  • 8x Simple Flour = 2 cups flour (assuming 1 part = 1/4 cup)
  • 4x Ice Cold Milk = 1 cup milk (assuming 1 part = 2 tbsp)
  • 4x Mild Spices = 4 tbsp cocoa (assuming spices = chocolate)
  • 8x Small Egg = 4 extra-large eggs (cause who can find small eggs?)
  • Flask of Port = 1/2 cup port wine
  • 3x Mageroyal =1 tsp lavender (it's a flower, at least!)
I decided to go for the normal (non-French) mixing style and just mix the wet ingredients and then add the dry ingredients. The batter turned out looking pretty good.
Blizzard's Delicious Chocolate Cake - batter

I was a bit leery, however, that the recipe called for four eggs, but no leavening of any sort. Would the cake rise?
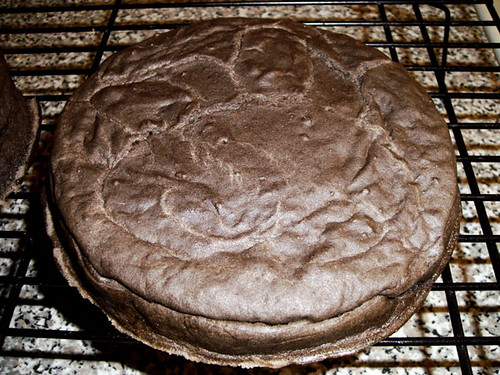
Blizzard's Delicious Chocolate Cake - baked Blizzard's Delicious Chocolate Cake - baked & sliced

That's right, folks. The cake came out very flat and very dense.

So dense, in fact, that I decided to use it as a makiwara.
cake turned makiwara

It barely rose, meaning the final cake was about 1.5 inches in thickness. It had barely any flavor (thanks to there being no sugar in the recipe, Blizzard).

So. Almost total fail. Next it was time to try this with some revisions, because by now it was clear that I needed a real delicious chocolate cake.

Kelley's Revised Recipe

  • 8x Simple Flour = 1.75 cups flour
  • 4x Ice Cold Milk = 1 cup milk
  • 4x Mild Spices = .75 cup cocoa, 1 tsp baking powder, 1 tsp salt, 2 tsp baking soda
  • 8x Small Egg = 2 extra-large eggs + .5 cup vegetable oil
  • Flask of Port = 1/2 cup port wine + 1 tsp vanilla extract
  • 3x Mageroyal =1 tsp lavender (it's a flower, at least!)
  • MISSING SUGAR = 2 cups sugar
As you can see, I altered the recipe to include some leavening, some sugar, and a slight alteration of wet-to-dry ratio. I also replaced some of the flour with more cocoa. The batter turned out nice and dark, and had a bit more volume than the first recipe.
Kelley's Delicious Chocolate Cake - batter

The cakes rose beautifully, and I had no trouble at all removing them from the rings.
Kelley's Delicious Chocolate Cake - baked

I baked two cakes and cut them both in half in order to stack them. I used three for stacking and the other for tasting. The cake was chocolatey and moist, but the port was a bit... odd. I knew I would need a very tasty frosting in order to even out the flavors. And I was glad that the images showed berries on the cake, too.

The Delicious Chocolate Cake

I decided to use a chocolate fudge frosting to fill between the layers and on the top. I also used sliced strawberries in between the layers, and halved strawberries to garnish the top of the cake.
Kelley's Delicious Chocolate Cake - complete Kelley's Delicious Chocolate Cake - complete

So, the cake looked pretty, and actually rather WoW-ish. But... would it taste good? I sliced a piece and gave it a taste. The fudge frosting and strawberries were actually pretty perfect for balancing out the flavors. Yay~!
Kelley's Delicious Chocolate Cake - sliced Kelley's Delicious Chocolate Cake - sliced

Final Thoughts

Blizzard was on the right track with this recipe, but in actuality, it didn't turn out so well. Hint: if you're going to use the word delicious in the name of your cake, you had better put some sugar in it. I'd also recommend leaving the port wine out, and replacing it with something more tasty, like coffee or maybe even some KahlĂșa -- and less of it.

Oh, and by the way -- yes, it's completely gluten-free.